✅ansible编写剧本步骤
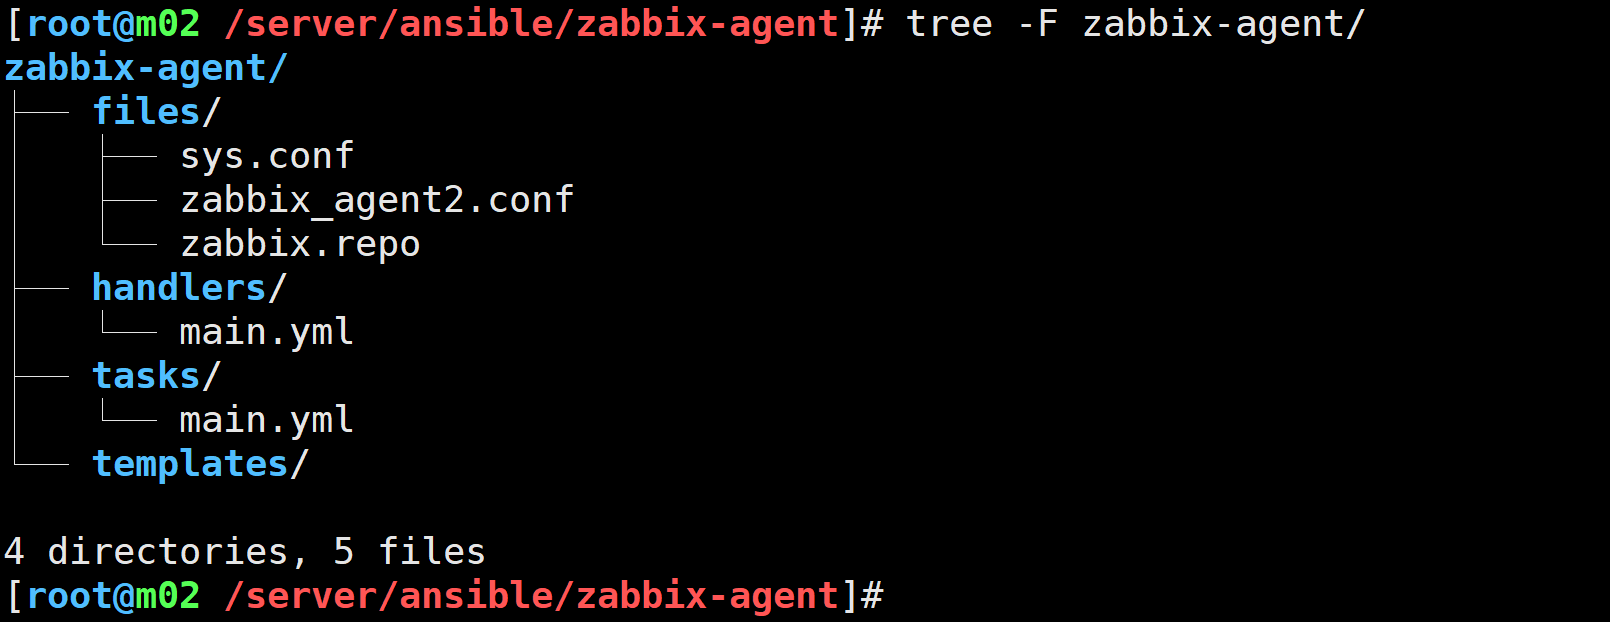
- 1️⃣创建roles目录结构
- 2️⃣在group_vars/all/main.yml中定义变量列表
- 3️⃣在tasks目录下编写tasks任务
- 4️⃣在files目录下准备部署文件
- 5️⃣在templates目录下创建j2模板文件
- 6️⃣在handlers目录下编写handlers
- 7️⃣在roles目录下编写主playbook
- 8️⃣运行主playbook
- 9️⃣检查验证
🌟ansible自动化安装zabbix客户端
mkdir -p zabbix-agent/{files,handlers,tasks,templates}
2️⃣在group_vars/all/main.yml中定义变量列表- 3️⃣在tasks目录下编写tasks任务
- name: 1.配置zabbix源copy:src: zabbix.repodest: /etc/yum.repos.d/backup: yes- name: 2.安装zabbix客户端yum:name: zabbix-agent2state: present- name: 3.分发配置文件copy:src: "{{ item.src }}"dest: "{{ item.dest }}"backup: yesloop:- {src: zabbix_agent2.conf,dest: /etc/zabbix/}- {src: sys.conf,dest: /etc/zabbix/zabbix_agent2.d/}notify:- restart_zabbix- name: 4.启动zabbixsystemd:name: zabbix-agent2enabled: yesstate: started
- 4️⃣在files目录下准备部署文件
- zabbix.repo
[zabbix]
name=zabbix
baseurl=https://mirrors.aliyun.com/zabbix/zabbix/7.0/rhel/7/x86_64/
enabled=1
gpgcheck=0
PidFile=/run/zabbix/zabbix_agent2.pid
LogFile=/var/log/zabbix/zabbix_agent2.log
LogFileSize=0
Server=172.16.1.63
ServerActive=127.0.0.1
Hostname=Zabbix server
Include=/etc/zabbix/zabbix_agent2.d/*.conf
PluginSocket=/run/zabbix/agent.plugin.sock
ControlSocket=/run/zabbix/agent.sock
Include=/etc/zabbix/zabbix_agent2.d/plugins.d/*.conf
UserParameter=proc.zombie,top -bn1 | awk 'NR==2{print $(NF-1)}'
UserParameter=user.login.ip[*],lastlog -u root | awk 'NR==2{print $$3}'
5️⃣在templates目录下创建j2模板文件- 6️⃣在handlers目录下编写handlers
- name: restart_zabbixsystemd:name: zabbix-agent2state: restarted
- hosts: allroles:- zabbix-agent
ansible-playbook top.yml
ansible lb -m shell -a 'zabbix_agent2 -t "system.hostname"'


![[黑马头条]-文章列表加载](http://pic.xiahunao.cn/[黑马头条]-文章列表加载)

的重复使用和db.rollback())


安装 Docker 容器完整教程)


完全指南)
)
