目录
两种方法创建Spring容器
自定义Spring容器及前置操作
Spring扫描逻辑实现
createBean()方法
getBean()方法
依赖注入(DI)
BeanNameAware接口
InitializingBean接口
BeanPostProcessor接口 + AOP的实现

Spring 是一个轻量级的 Java 开发框架,最初由 Rod Johnson 在 2002 年提出,主要解决 企业级开发中的复杂性问题。其核心主要是 IoC(控制反转) 和 AOP(面向切面编程)。
-
IoC(Inversion of Control)控制反转
-
对象的创建和依赖的维护由容器(Spring)来管理,而不是由程序员自己
new出来。 -
核心实现方式:DI(依赖注入)。
-
-
AOP(Aspect Oriented Programming)面向切面编程
-
通过代理方式实现横切逻辑的解耦(如事务、日志、权限)。
-
核心实现方式:动态代理。
-
而我们可以通过学习手搓Spring的实现来快速了解Spring底层源码的实现。
两种方法创建Spring容器
我们想要再启动类上构建Spring容器可以使用下面两种方法:
- ClassPathXmlApplicationContext => 在 XML 文件中定义了
<bean>元素(或者<context:component-scan>),Spring 会根据这些配置来创建 Bean。 - AnnotationConfigApplicationContext => 传入的是一个 Java 配置类(
AppConfig)。
public static void main(String[] args) {// ① 使用 XML 配置文件创建容器ClassPathXmlApplicationContext classPathXmlApplicationContext =new ClassPathXmlApplicationContext("applicationContext.xml");// ② 使用 Java 配置类(注解方式)创建容器AnnotationConfigApplicationContext applicationContext =new AnnotationConfigApplicationContext(AppConfig.class);// ③ 从容器中获取 BeanUserService userService = (UserService) applicationContext.getBean("userService");userService.test();
}
而Java配置类可以这样定义:
通过@ComponentScan注解来指定Spring扫描哪个路径下的文件。也可以通过使用@Bean注解的方式直接定义Bean。
import cn.spring.com.spring.ComponentScan;@ComponentScan("cn.spring.com.eleven.service")
public class AppConfig {@Bean   // 定义一个Bean,方法名默认就是Bean的idpublic UserService userService() {return new UserService();}
}
自定义Spring容器及前置操作
我们在手搓一个Spring的时候,直接使用Springboot工程创建即可,另外pom.xml不需要导入任何依赖:
<?xml version="1.0" encoding="UTF-8"?>
<project xmlns="http://maven.apache.org/POM/4.0.0" xmlns:xsi="http://www.w3.org/2001/XMLSchema-instance"xsi:schemaLocation="http://maven.apache.org/POM/4.0.0 https://maven.apache.org/xsd/maven-4.0.0.xsd"><modelVersion>4.0.0</modelVersion><groupId>cn.spring.com</groupId><artifactId>spring-eleven</artifactId><version>0.0.1-SNAPSHOT</version><name>Spring-Eleven</name></project>
大致的结构如下:
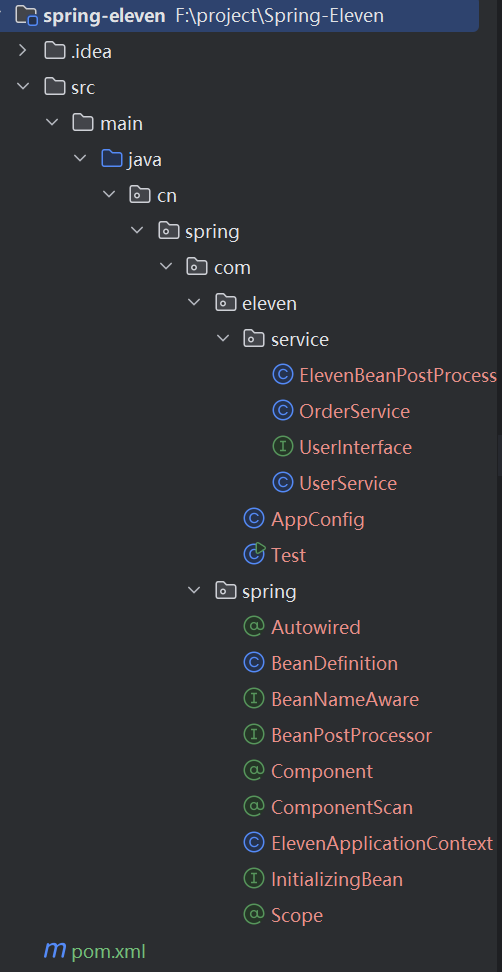
我们将Spring该实现的注解、接口等放在Spring目录下,将我们自己的测试类放在eleven目录下。
随后我们先创建一个自定义容器类:
这里我们主要实现的是模拟 AnnotationConfigApplicationContext 使用Java配置类创建Spring容器。
package cn.spring.com.spring;public class ElevenApplicationContext {private Class configClass; // 配置类/*** 构造Spring容器(需要传递配置类)* @param configClass 配置类*/public ElevenApplicationContext(Class configClass) {this.configClass = configClass;}
}
之后编写配置类AppConfig:
package cn.spring.com.eleven;public class AppConfig {}
而为了实现Spring容器可以通过配置类扫描哪个路径下的文件,我们自定义@ComponentScan注解:
value参数代表的是扫描路径。
package cn.spring.com.spring;import java.lang.annotation.ElementType;
import java.lang.annotation.Retention;
import java.lang.annotation.RetentionPolicy;
import java.lang.annotation.Target;/*** 组件扫描注解*/
@Target(ElementType.TYPE) // 类型注解
@Retention(RetentionPolicy.RUNTIME) // 运行时注解
public @interface ComponentScan {String value(); // 扫描的包路径
}
之后在AppConfig上添加@ComponentScan注解:
这里我准备扫描cn.spring.com.eleven.service路径下的文件,所以我将要在该目录下去创建我的Service。
package cn.spring.com.eleven;import cn.spring.com.spring.ComponentScan;@ComponentScan("cn.spring.com.eleven.service")
public class AppConfig {}
创建UserService:
package cn.spring.com.eleven.service;public class UserService{}
而为了将UserService交给Spring容器去管理,我们需要自定义@Component注解:
package cn.spring.com.spring;import java.lang.annotation.ElementType;
import java.lang.annotation.Retention;
import java.lang.annotation.RetentionPolicy;
import java.lang.annotation.Target;/*** 组件注解*/
@Target(ElementType.TYPE) // 类型注解
@Retention(RetentionPolicy.RUNTIME) // 运行时注解
public @interface Component {String value() default ""; // 组件的名称
}
之后在UserService上添加@Component注解:
@Component("userService")
public class UserService {}
最后将自定义的Java配置类交给自定义容器:
package cn.spring.com.eleven;import cn.spring.com.eleven.service.UserService;
import cn.spring.com.spring.ElevenApplicationContext;public class Test {public static void main(String[] args) {// 传一个Spring容器的配置文件ElevenApplicationContext applicationContext = new ElevenApplicationContext(AppConfig.class);}
}
而我们创建 ElevenApplicationContext 肯定会调用其构造方法,所以为了实现实现扫描指定路径下的文件,我们需要拿到@ComponentScan内的value值,根据value值进行扫描那个目录下的文件。
Spring扫描逻辑实现
在 ElevenApplicationContext 构造方法中编写扫描逻辑,我们可以将扫描逻辑抽出成一个方法void Scan(),之后在构造方法内调用即可。
首先通过传递的 configClass,使用 getDeclaredAnnotation(ComponentScan.class) 方法来拿到ComponentScan注解,随后.value()拿到内部值并转换路径格式:
ComponentScan componentScan = (ComponentScan) configClass.getDeclaredAnnotation(ComponentScan.class);
String path = componentScan.value(); // 扫描路径
path = path.replace(".", "/");
现在已经拿到了扫描路径,所以我们需要根据扫描路径拿到路径下的所有类。那么可以使用类加载器ClassLoader去拿刚刚获得的扫描路径下的资源,随后转换成目录:
// 扫描(使用应用类加载器ClassLoader)
ClassLoader classLoader = ElevenApplicationContext.class.getClassLoader();
// 因为是应用类加载器,会去 F:\project\Spring-Eleven\target\classes\cn\spring\com\eleven\service 下拿到资源
// 这里的resource可以是资源也可以是目录,这里拿到的是目录
URL resource = classLoader.getResource(path);
// resource转换成file目录,方便调用
File file = new File(resource.getFile());
之后判断file是否为目录,如果是则通过 file.listFiles() 方法拿到目录下的所有文件:
if (file.isDirectory()) {File[] files = file.listFiles();for (File f : files) {System.out.println(f.getAbsolutePath());}
}
之后在循环file文件,首先根据目录来拿到类名className,随后根据类名拿到类对象Class<?> clazz = classLoader.loadClass(className),随后使用 clazz.isAnnotationPresent(Component.class) 判断当前类上是否有@Component注解。
// file是否为目录
if (file.isDirectory()) {
File[] files = file.listFiles();
for (File f : files) {
System.out.println(f.getAbsolutePath());
if (f.getAbsolutePath().endsWith(".class")) {// 转换可用的路径格式// F:\project\Spring-Eleven\target\classes\cn\spring\com\eleven\service\UserService.class// cn.spring.com.eleven.service.UserServiceString className = f.getAbsolutePath().replace("\\", "/");className = className.substring(className.indexOf("cn"), className.indexOf(".class"));  // 截取类名className = className.replace("/", ".");  // 替换成点号System.out.println(className);// 加载类try {Class<?> clazz = classLoader.loadClass(className);// 判断是否有@Component注解if (clazz.isAnnotationPresent(Component.class)) {System.out.println("有@Component注解,表示当前类是一个Bean对象");}}
}
在上面我们已经可以判断该类上是否有@Component注解,由于有@Component注解,代表我们想要将该类生成一个Bean对象,所以需要构建 getBean() 方法。
在这里需要讲述Bean的作用域!!!
单例Bean与原型Bean的区别:
①单例bean(singleton):在整个 Spring 容器中,同一个 Bean 定义只有一个实例。
②原型bean(prototype):每次调用 getBean() 时,都会创建一个新的实例。
在Spring中是通过@Scope注解去解释当前Bean的作用域,所以我们创建该注解:
package cn.spring.com.spring;import java.lang.annotation.ElementType;
import java.lang.annotation.Retention;
import java.lang.annotation.RetentionPolicy;
import java.lang.annotation.Target;/*** 作用域注解*/
@Target(ElementType.TYPE)
@Retention(RetentionPolicy.RUNTIME)
public @interface Scope {/*** 单例Bean还是原型Bean*/String value() default "singleton";
}
之后我们可以在UserService加入注解让它暂时代表原型Bean:
package cn.spring.com.eleven.service;
import cn.spring.com.spring.*;@Component("userService")
@Scope("prototype")
public class UserService {}
现在UserService要创建的是原型Bean,所以我们在Test下拿到三次不同的UserService的Bean对象。
package cn.spring.com.eleven;import cn.spring.com.eleven.service.UserService;
import cn.spring.com.spring.ElevenApplicationContext;public class Test {public static void main(String[] args) {// 传一个Spring容器的配置文件ElevenApplicationContext applicationContext = new ElevenApplicationContext(AppConfig.class);Object userService =  applicationContext.getBean("userService");Object userService =  applicationContext.getBean("userService");Object userService =  applicationContext.getBean("userService");}
}
而现在如何让单例Bean能够确保getBean()可以得到同一个Bean对象呢?
这个时候我们可以使用单例池来存储创建出来的单例Bean对象:
// 单例池
// map存储的都是单例bean =》<bean名字,bean对象>
private ConcurrentHashMap<String, Object> singletonObjects = new ConcurrentHashMap<>();
随后我们创建getBean方法,在方法内传入BeanName:
/*** 获取Bean对象* @param beanName Bean的名字* @return Bean对象*/
public Object getBean(String beanName) {}
之后我们需要研究如何使用beanName来判断是单例Bean还是原型Bean呢?
这个时候Spring底层是使用了 BeanDefinition 定义类:
用来定义Bean对象,内部有Bean的类型以及Bean的作用域,其他的也可以自定义。
package cn.spring.com.spring;/*** Bean定义类*/
public class BeanDefinition {/*** Bean的类型*/private Class aClass;/*** Bean的作用域*/private String scope;public BeanDefinition(Class aClass, String scope) {this.aClass = aClass;this.scope = scope;}public BeanDefinition() {}public Class getaClass() {return aClass;}public String getScope() {return scope;}public void setScope(String scope) {this.scope = scope;}public void setaClass(Class<?> clazz) {this.aClass = clazz;}
}
所以现在我们需要再类上有@Component注解的基础上先通过@Component注解拿到beanName类名字,随后去判断类上是否有@Scope注解,一但有@Scope注解则代表该类是原型Bean,之后使用BeanDefinition定义类的类构造方法将BeanName与Scope传递。而为了方便以后再任意方法内可轻易的拿到Bean的属性我们可以定义一个 beanDefinitionMap 对象池:
// BeanDefinition对象池
// map存储的都是BeanDefinition对象 =》<bean名字,bean定义对象>
private ConcurrentHashMap<String, BeanDefinition> beanDefinitionMap = new ConcurrentHashMap<>();
随后将BeanDefinition存到 beanDefinitionMap 对象池内,下面是实现代码:
/*** 在容器内通过配置类扫描Bean* @param configClass 配置类*/
private void scan(Class configClass) {// 解析配置类// 解析@ComponentScan注解 --》扫描路径 --》扫描包下所有的类ComponentScan componentScan = (ComponentScan) configClass.getDeclaredAnnotation(ComponentScan.class);String path = componentScan.value(); // 扫描路径path = path.replace(".", "/");// 扫描(使用类加载器ClassLoader)ClassLoader classLoader = ElevenApplicationContext.class.getClassLoader();URL resource = classLoader.getResource(path);// 转换成目录File file = new File(resource.getFile());// file是否为目录if (file.isDirectory()) {File[] files = file.listFiles();for (File f : files) {System.out.println(f.getAbsolutePath());if (f.getAbsolutePath().endsWith(".class")) {// 转换可用的路径格式// F:\project\Spring-Eleven\target\classes\cn\spring\com\eleven\service\UserService.class// cn.spring.com.eleven.service.UserServiceString className = f.getAbsolutePath().replace("\\", "/");className = className.substring(className.indexOf("cn"), className.indexOf(".class"));  // 截取类名className = className.replace("/", ".");  // 替换成点号System.out.println(className);// 加载类try {Class<?> clazz = classLoader.loadClass(className);// 判断是否有@Component注解if (clazz.isAnnotationPresent(Component.class)) {System.out.println("有@Component注解,表示当前类是一个Bean对象");// 是单例bean还是原型bean// 解析类,-》BeanDefinition对象// 首先通过Component拿到Bean的名字Component componentAnnotation = clazz.getDeclaredAnnotation(Component.class);String beanName = componentAnnotation.value();// 创建BeanDefinition对象BeanDefinition beanDefinition = new BeanDefinition();// 设置BeanDefinition的类型beanDefinition.setaClass(clazz);// 是否有Scope注解if(clazz.isAnnotationPresent(Scope.class)){// 然后通过Scope注解拿到Bean的作用域Scope scopeAnnotation = clazz.getDeclaredAnnotation(Scope.class);String scope = scopeAnnotation.value(); // 拿到Scope注解的值beanDefinition.setScope(scope); // 设置BeanDefinition的作用域} else {beanDefinition.setScope("singleton"); // 默认是单例}// 存到BeanDefinition对象池beanDefinitionMap.put(beanName, beanDefinition);}} catch (ClassNotFoundException e) {e.printStackTrace();} catch (InvocationTargetException e) {throw new RuntimeException(e);} catch (InstantiationException e) {throw new RuntimeException(e);} catch (IllegalAccessException e) {throw new RuntimeException(e);} catch (NoSuchMethodException e) {throw new RuntimeException(e);}}}}
}
createBean()方法
在上面,我们已经在容器扫描指定路径下的文件,并将需要创建Bean对象的类名 + Bean作用域封装成BeanDefinition定义类存入 beanDefinitionMap 对象池,那么接下来我们需要通过遍历 beanDefinitionMap 对象池来拿出单例bean,并且通过 createBean(beanName,beanDefinition) 方法来拿到创建完成的Bean对象,随后存入 singletonObjects 单例池中:
/*** 构造Spring容器(需要传递配置类)* @param configClass 配置类*/
public ElevenApplicationContext(Class configClass) {this.configClass = configClass;// 解析配置类// 解析@ComponentScan注解 --》扫描路径 --》扫描包下所有的类 -> BeanDefination -> BeanDefinationMapscan(configClass);// 在BeanDefinitionMap中拿出单例Beanfor (String beanName : beanDefinitionMap.keySet()) {BeanDefinition beanDefinition = beanDefinitionMap.get(beanName);// 找出单例Beanif ("singleton".equals(beanDefinition.getScope())){// 单例BeanObject o = createBean(beanName,beanDefinition);singletonObjects.put(beanName, o);}}
}
所以接下来我们需要创建createBean()方法来创建Bean对象并返回:
我们现在有BeanName以及BeanDefinition,所以先通过 beanDefinition.getaClass() 方法获取 需要创建的Bean类型,随后通过 aClass.getDeclaredConstructor().newInstance() 无参构造方法反射得到实例对象,最后返回该对象:
/*** 创建Bean对象* @param beanName Bean的名称* @param beanDefinition Bean的定义对象* @return Bean对象*/
private Object createBean(String beanName,BeanDefinition beanDefinition) {// 获取需要创建的Bean类型Class aClass = beanDefinition.getaClass();// 通过无参构造方法反射得到实例对象Object instance = aClass.getDeclaredConstructor().newInstance();// 返回实例对象return instance;
}
getBean()方法
在获取Bean对象时,我们需先去判断在BeanDefinition对象池里是否有Bean对象?如果有就可以通过BeanName来拿到该Bean的BeanDefinition定义类,随后根据定义类内部的scope属性判断该Bean是单例还是原型,如果是单例可去单例池获取,如果是原型Bean则需要创建新的对象并返回:
/*** 获取Bean对象* @param beanName Bean的名字* @return Bean对象*/
public Object getBean(String beanName) {// 在BeanDefinition对象池里是否有Bean对象if(beanDefinitionMap.containsKey(beanName)){BeanDefinition beanDefinition = beanDefinitionMap.get(beanName);// 判断是单例Bean还是原型Beanif("singleton".equals(beanDefinition.getScope())){// 单例Bean,在单例池获取return singletonObjects.get(beanName);} else {// 原型Bean,每次都创建新的对象return createBean(beanName,beanDefinition);}} else {throw new NullPointerException("Bean不存在");}
}
依赖注入(DI)
依赖:一个类使用到另一个类的功能。例如我们将要实现 UserService 依赖 OrderService。
注入:不需要自己 new,而是由 Spring 容器自动把依赖对象赋给我们。
➡️ 简单说:以前我们需要自己去 new 一个 OrderS二vice 对象,这样做代码强耦合。但是现在 Spring 容器帮助我们创建 OrderS二vice 并注入到 UserService ,以此来达到解耦的效果。
控制反转(IoC)的核心思想:如果在 Bean 内部手动 new 一个对象,那这个对象就不在 Spring 的 IoC 容器中管理了。
在Spring中,一般是通过@Autowired注解来实现的,所以我们在UserService来依赖注入一个OrderService:
package cn.spring.com.eleven.service;import cn.spring.com.spring.*;@Component("userService")
@Scope("prototype")
public class UserService {@Autowiredprivate OrderService orderService;
}
因为我们需要再UserService依赖注入一个OrderService,所以需要在createBean()方法内加入DI:
我们可以通过使用 aClass.getDeclaredFields() 方法获取一个 Field 数组,其内部包含当前类中声明的所有字段(成员变量),之后需要遍历字段上是否有@Autowired注解,如果有那么就可以通过属性名字找Bean对象,随后setAccessible(true) 来关闭 Java 的访问检查机制,允许通过反射来操作 private/protected/default 修饰的字段,最后使用 field.set(instance, bean) 方法把容器里准备好的 bean 塞进 instance 对象的某个字段里:
/*** 创建Bean对象* @param beanName Bean的名称* @param beanDefinition Bean的定义对象* @return Bean对象*/
private Object createBean(String beanName, BeanDefinition beanDefinition) {// 1. 获取需要创建的Bean类型Class aClass = beanDefinition.getaClass();try {// 2. 通过无参构造方法反射得到实例对象Object instance = aClass.getDeclaredConstructor().newInstance();// ===================== 依赖注入开始 =====================// 3. 获取 Bean 内所有的属性(成员变量)Field[] fields = aClass.getDeclaredFields();for (Field field : fields) {// 4. 判断属性上是否有 @Autowired 注解if (field.isAnnotationPresent(Autowired.class)) {// 5. 根据属性名字来找容器中的 Bean 对象Object bean = getBean(field.getName());if (bean == null) {throw new RuntimeException("依赖注入失败,没有找到对应的Bean对象");}// 6. 打破封装,让私有属性可以被赋值field.setAccessible(true);// 7. 把依赖对象注入到当前正在创建的 Bean// instance -> 当前 Bean(例如 UserService)// bean     -> 依赖对象(例如 UserRepository)field.set(instance, bean);}}// ===================== 依赖注入结束 =====================return instance;} catch (Exception e) {throw new RuntimeException(e);}
}
BeanNameAware接口
BeanNameAware 是 Spring 容器中 Aware 系列接口 之一,用来让 Bean 感知到自己在容器中的名字。
-
获取 Bean 的名字:有些时候,一个类可能被容器加载多次(比如配置了多个别名),实现这个接口后,它就能知道自己被容器叫做啥。
-
区分不同的 Bean 实例:当同一个类被注册成多个 Bean 时,可以通过名字来区别。
-
调试/日志:在日志打印时,能更直观地输出 Bean 的名字,方便定位问题。
-
框架扩展:在某些自定义框架或工具中,可以根据 Bean 名称实现一些动态逻辑。
package cn.spring.com.spring;/*** 实现该接口的Bean可以感知自己的BeanName* @Author: Eleven*/
public interface BeanNameAware {void setBeanName(String beanName);
}
当一个 Bean 实现了这个接口,Spring 容器在实例化并注入依赖完成后,会调用它的 setBeanName() 方法,把当前 Bean 在容器中的 name 传进去。所以接下来我们就要实现这个逻辑。
我们先让UserService去引入该接口:
package cn.spring.com.eleven.service;import cn.spring.com.spring.*;@Component("userService")
@Scope("prototype")
public class UserService implements BeanNameAware {@Autowiredprivate OrderService orderService;private String beanName;@Overridepublic void setBeanName(String beanName) {this.beanName = beanName;}
}
随后在createBean()方法中去调用:
首先去判断当前的Bean对象是不是实现了BeanNameAware接口,如果是的话就将该Bean对象强制转型为 BeanNameAware 类型,之后调用内部的setBeanName()方法,把这个 Bean 在容器里的名字注入进去。
👉 这是典型的 Aware 回调机制:
容器检查 -> 确认实现接口 -> 调用接口方法 -> 注入容器上下文信息。
/*** 创建Bean对象* @param beanName Bean的名称* @param beanDefinition Bean的定义对象* @return Bean对象*/
private Object createBean(String beanName,BeanDefinition beanDefinition) {// 获取需要创建的Bean类型Class aClass = beanDefinition.getaClass();try {// 通过无参构造方法反射得到实例对象Object instance = aClass.getDeclaredConstructor().newInstance();// 依赖注入DIField[] fields = aClass.getDeclaredFields();for (Field field : fields) {// 2. 判断属性上是否有@Autowired注解if (field.isAnnotationPresent(Autowired.class)){// 根据属性名字来找Bean对象Object bean = getBean(field.getName());if (bean == null){throw new RuntimeException("依赖注入失败,没有找到对应的Bean对象");}// 依赖注入// 设置属性为可访问field.setAccessible(true);// 设置属性值// instance 是当前正在创建的 Bean 对象// bean 是从容器中拿到的依赖对象field.set(instance, bean);}}// 判断是否实现了BeanNameAware接口(感知自己的BeanName)if (instance instanceof BeanNameAware){// 强转并调用setBeanName方法拿到自己的BeanName((BeanNameAware) instance).setBeanName(beanName);}// 返回实例对象return instance;} catch (InstantiationException e) {throw new RuntimeException(e);} catch (IllegalAccessException e) {throw new RuntimeException(e);} catch (InvocationTargetException e) {throw new RuntimeException(e);} catch (NoSuchMethodException e) {throw new RuntimeException(e);} catch (Exception e) {throw new RuntimeException(e);}
}
InitializingBean接口
InitializingBean 接口是 Spring 里面 Bean 生命周期 的一个关键接口,跟我们前面说的 BeanNameAware 接口类似,它也是一种 回调接口,不过用途不同。
package cn.spring.com.spring;/*** 实现该接口的Bean可以在Bean初始化后调用afterPropertiesSet方法* @Author: Eleven*/
public interface InitializingBean {public void afterPropertiesSet() throws Exception;
}
调用 afterPropertiesSet() 方法作用是当 Bean 的所有属性都注入完成之后,Spring 容器会回调这个方法,让 Bean 有机会执行一些“初始化逻辑”,适合做那些 依赖注入完成后,必须再进行一次额外配置的场景。
我们在UserSerivce内引入该接口:
package cn.spring.com.eleven.service;import cn.spring.com.spring.*;@Component("userService")
@Scope("prototype")
public class UserService implements BeanNameAware, InitializingBean {@Autowiredprivate OrderService orderService;private String beanName;@Overridepublic void setBeanName(String beanName) {this.beanName = beanName;}@Overridepublic void afterPropertiesSet() throws Exception {System.out.println("UserService初始化了");}
}
跟上面的 BeanNameAware 接口实现类似,同样先去判断当前的Bean对象是不是实现了InitializingBean 接口,如果是的话就将该Bean对象强制转型为 InitializingBean 类型,之后调用内部的 afterPropertiesSet() 方法。
/*** 创建Bean对象* @param beanName Bean的名称* @param beanDefinition Bean的定义对象* @return Bean对象*/
private Object createBean(String beanName,BeanDefinition beanDefinition) {// 获取需要创建的Bean类型Class aClass = beanDefinition.getaClass();try {// 通过无参构造方法反射得到实例对象Object instance = aClass.getDeclaredConstructor().newInstance();// 依赖注入DIField[] fields = aClass.getDeclaredFields();for (Field field : fields) {// 2. 判断属性上是否有@Autowired注解if (field.isAnnotationPresent(Autowired.class)){// 根据属性名字来找Bean对象Object bean = getBean(field.getName());if (bean == null){throw new RuntimeException("依赖注入失败,没有找到对应的Bean对象");}// 依赖注入// 设置属性为可访问field.setAccessible(true);// 设置属性值// instance 是当前正在创建的 Bean 对象// bean 是从容器中拿到的依赖对象field.set(instance, bean);}}// 判断是否实现了BeanNameAware接口(感知自己的BeanName)if (instance instanceof BeanNameAware){// 强转并调用setBeanName方法拿到自己的BeanName((BeanNameAware) instance).setBeanName(beanName);}// 判断是否实现了InitializingBean接口(初始化)if (instance instanceof InitializingBean){// 强转并调用afterPropertiesSet方法(初始化)((InitializingBean) instance).afterPropertiesSet();}// 返回实例对象return instance;} catch (InstantiationException e) {throw new RuntimeException(e);} catch (IllegalAccessException e) {throw new RuntimeException(e);} catch (InvocationTargetException e) {throw new RuntimeException(e);} catch (NoSuchMethodException e) {throw new RuntimeException(e);} catch (Exception e) {throw new RuntimeException(e);}
}
BeanPostProcessor接口 + AOP的实现
BeanPostProcessor 是 Spring 框架里最核心、最常考的扩展接口之一。它的作用就是:在 Bean 初始化前后,做一些“增强”或“加工”。
package cn.spring.com.spring;/** 定义一个Bean的后置处理器*/
public interface BeanPostProcessor {/** 初始化之前调用*/Object postProcessBeforeInitialization(Object bean, String beanName);/** 初始化之后调用*/Object postProcessAfterInitialization(Object bean, String beanName);
}
Spring 给了开发者一个“切入点”,让我们能在 Bean 初始化的前后,统一做一些额外处理。
常见用途:
修改 Bean 属性(比如给某些字段设置默认值)
包装 Bean(比如 AOP 代理就是在这一步完成的)
检查或替换 Bean(如果发现不合规,可以替换成另一个对象)
实现通用逻辑(比如自动注入日志、监控、事务代理等)
假设我们想要再UserService中设置一个name属性,然后想要再Bean初始化前给name赋值:
package cn.spring.com.eleven.service;import cn.spring.com.spring.*;@Component("userService")
@Scope("prototype")
public class UserService UserInterface {@Autowiredprivate OrderService orderService;private String beanName;private String name;@Overridepublic void setBeanName(String beanName) {this.beanName = beanName;}public void setName(String newUserService) {this.name = newUserService;}}
那我们就可以使用创建新的类去继承这个 BeanPostProcessor 接口:
package cn.spring.com.eleven.service;import cn.spring.com.spring.BeanPostProcessor;
import cn.spring.com.spring.Component;
import cn.spring.com.spring.ElevenApplicationContext;import java.lang.reflect.InvocationHandler;
import java.lang.reflect.Method;
import java.lang.reflect.Proxy;@Component("ElevenBeanPostProcessor")
public class ElevenBeanPostProcessor implements BeanPostProcessor {@Overridepublic Object postProcessBeforeInitialization(Object bean, String beanName) {System.out.println("初始化之前调用");if(beanName.equals("userService")){((UserService)bean).setName("eleven");}return bean;}@Overridepublic Object postProcessAfterInitialization(Object bean, String beanName) {System.out.println("初始化之后调用");return bean;}
}
之后我们在扫描类的过程就需要去判断这个类加了@Component并且还引入了 BeanPostProcessor,之后在外面自定义一个BeanPostProcessor对象池存入,方便后序直接查找:
// BeanPostProcessor对象池
private List<BeanPostProcessor> beanPostProcessorList = new ArrayList<>();// 判断clazz这个类是否实现了BeanPostProcessor接口
if (BeanPostProcessor.class.isAssignableFrom(clazz)){BeanPostProcessor beanPostProcessor = (BeanPostProcessor) clazz.getDeclaredConstructor().newInstance();// 把BeanPostProcessor对象添加到BeanPostProcessor对象池beanPostProcessorList.add(beanPostProcessor);
}
之后在createBean()方法内去遍历BeanPostProcessor对象池找到当前自定义的两个方法去调用:
/*** 创建Bean对象* @param beanName Bean的名称* @param beanDefinition Bean的定义对象* @return Bean对象*/
private Object createBean(String beanName,BeanDefinition beanDefinition) {// 获取需要创建的Bean类型Class aClass = beanDefinition.getaClass();try {// 通过无参构造方法反射得到实例对象Object instance = aClass.getDeclaredConstructor().newInstance();// 依赖注入DIField[] fields = aClass.getDeclaredFields();for (Field field : fields) {// 2. 判断属性上是否有@Autowired注解if (field.isAnnotationPresent(Autowired.class)){// 根据属性名字来找Bean对象Object bean = getBean(field.getName());if (bean == null){throw new RuntimeException("依赖注入失败,没有找到对应的Bean对象");}// 依赖注入// 设置属性为可访问field.setAccessible(true);// 设置属性值// instance 是当前正在创建的 Bean 对象// bean 是从容器中拿到的依赖对象field.set(instance, bean);}}// 判断是否实现了BeanNameAware接口(感知自己的BeanName)if (instance instanceof BeanNameAware){// 强转并调用setBeanName方法拿到自己的BeanName((BeanNameAware) instance).setBeanName(beanName);}// 调用BeanPostProcessor的postProcessBeforeInitialization方法for (BeanPostProcessor beanPostProcessor : beanPostProcessorList) {instance = beanPostProcessor.postProcessBeforeInitialization(instance, beanName);}// 判断是否实现了InitializingBean接口(初始化)if (instance instanceof InitializingBean){// 强转并调用afterPropertiesSet方法(初始化)((InitializingBean) instance).afterPropertiesSet();}// 调用BeanPostProcessor的postProcessAfterInitialization方法for (BeanPostProcessor beanPostProcessor : beanPostProcessorList) {instance = beanPostProcessor.postProcessAfterInitialization(instance, beanName);}// 返回实例对象return instance;} catch (InstantiationException e) {throw new RuntimeException(e);} catch (IllegalAccessException e) {throw new RuntimeException(e);} catch (InvocationTargetException e) {throw new RuntimeException(e);} catch (NoSuchMethodException e) {throw new RuntimeException(e);} catch (Exception e) {throw new RuntimeException(e);}
}
接下来就需要实现AOP,AOP一般都是实现在初始化后,所以我们要改写postProcessAfterInitialization()方法:
package cn.spring.com.eleven.service;import cn.spring.com.spring.BeanPostProcessor;
import cn.spring.com.spring.Component;
import cn.spring.com.spring.ElevenApplicationContext;import java.lang.reflect.InvocationHandler;
import java.lang.reflect.Method;
import java.lang.reflect.Proxy;@Component("ElevenBeanPostProcessor")
public class ElevenBeanPostProcessor implements BeanPostProcessor {@Overridepublic Object postProcessBeforeInitialization(Object bean, String beanName) {System.out.println("初始化之前调用");return bean;}// 在 Bean 创建完成后,换掉原来的 Bean 对象,返回一个代理对象。@Overridepublic Object postProcessAfterInitialization(Object bean, String beanName) {System.out.println("初始化之后调用");if(beanName.equals("userService")){// JDK的动态代理Object proxyInstance = Proxy.newProxyInstance(ElevenBeanPostProcessor.class.getClassLoader(), bean.getClass().getInterfaces(), new InvocationHandler() {@Overridepublic Object invoke(Object proxy, Method method, Object[] args) throws Throwable {System.out.println("JDK的动态代理");return method.invoke(bean, args);}});return proxyInstance;}return bean;}
}


)


)


