文章目录
前言
1 安装 RPLidar 和 Pixhawk
2 检查 RPLidar 的串行端口
3 安装更多软件包
4 创建Catkin工作空间
5 安装 RPLidar 节点
6 安装 Google Cartographer
前言
本页展示了如何使用 RPLidarA2 激光雷达(RPLidarA2 lidar)设置 ROS 和 Google Cartographer SLAM,为 ArduPilot 提供本地位置估计,使其可以在没有 GPS 的情况下运行。
这些说明在使用 APSync 更新的 NVidia TX2 上进行了测试,然后按照此处所述安装(installed as described here)了 ROS 和 MAVROS。
!Note
这些页面正在制作中。
1 安装 RPLidar 和 Pixhawk
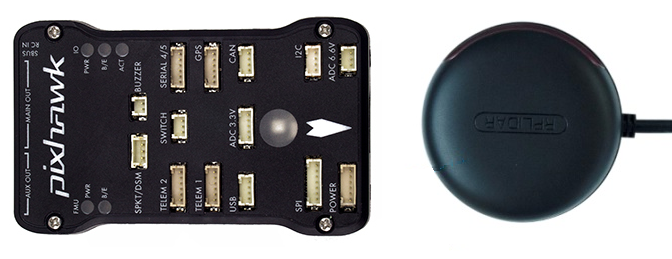
应调整 RPLidar 的方向,使其 USB 调试线线与飞行控制器上的箭头方向一致。
USB 调试线应插入运行 ROS 的配套计算机的 USB 端口。
2 检查 RPLidar 的串行端口
将 RPLidarA2 插入配套计算机。如果使用安装在 AUVidea J120 电路板上的 TX2,请确保将激光雷达插入下方的 USB 端口。
ls -l /dev/tty*
激光雷达应该显示为 /dev/ttyUSB0 或 /dev/ttyACM0。
如果输入“lsusb”,设备也应显示为 "Cygnal Integrated Products, Inc. CP210x UART 桥接器 / myAVR mySmartUSB light"。
根据上面找到的串行端口,只需输入以下两条命令中的一条,就可以读取设备信息:
sudo usermod -a -G dialout
3 安装更多软件包
完整安装 ROS 桌面:
sudo apt-get install ros-<distro>-desktop
或安装这些单独的软件包(此列表尚不完整):
sudo apt-get install ros-<distro>-tf ros-<distro>-tf-conversions ros-<distro>-laser-geometry
sudo apt-get install ros-<distro>-cv-bridge ros-<distro>-image-transport
sudo apt-get install qt4-qmake qt4-dev-tools
sudo apt-get install protobuf-compiler
4 创建Catkin工作空间
在你的主目录中:
cd $HOME
mkdir -p catkin_ws/src
cd catkin_ws
catkin_init_workspace
5 安装 RPLidar 节点
在工作区安装 RPLidar 节点:
cd $HOME/catkin_ws/src
git clone https://github.com/Slamtec/rplidar_ros.git
6 安装 Google Cartographer
安装更多软件包:
sudo apt-get install python-wstool python-rosdep ninja-build
使用 wstool 重新初始化工作区,然后合并 cartographer_ros.rosinstall 文件并获取依赖代码。
cd $HOME/catkin_ws
wstool init src
wstool merge -t src https://raw.githubusercontent.com/googlecartographer/cartographer_ros/master/cartographer_ros.rosinstall
wstool update -t src
安装 proto3 和 deb 依赖项:
src/cartographer/scripts/install_proto3.sh
sudo rosdep init # if error message appears about file already existing, just ignore and continue
rosdep update
rosdep install --from-paths src --ignore-src --rosdistro=${ROS_DISTRO} -y
将机器人姿态发布(Robot Pose Publisher)程序包克隆到工作区中:
cd $HOME/catkin_ws/src
git clone https://github.com/GT-RAIL/robot_pose_publisher.git
使用你喜欢的编辑器(如“gedit”)创建 cartographer_ros 启动文件
cd $HOME/catkin_ws/src/cartographer_ros/cartographer_ros/launch
gedit cartographer.launch
将以下内容复制粘贴到文件中:
<launch><param name="/use_sim_time" value="false" /><node name="cartographer_node"pkg="cartographer_ros"type="cartographer_node"args="-configuration_directory $(find cartographer_ros)/configuration_files -configuration_basename cartographer.lua"output="screen"><remap from="odom" to="/mavros/local_position/odom" /><remap from="imu" to="/mavros/imu/data" /></node><node name="cartographer_occupancy_grid_node"pkg="cartographer_ros"type="cartographer_occupancy_grid_node" /><node name="robot_pose_publisher"pkg="robot_pose_publisher"type="robot_pose_publisher"respawn="false"output="screen" ><param name="is_stamped" type="bool" value="true"/><remap from="robot_pose" to="/mavros/vision_pose/pose" /></node><node pkg="tf" type="static_transform_publisher" name="base_to_laser_broadcaster" args="0 0 0 0 0 0 base_link laser 100" />
</launch>使用我们喜欢的编辑器(如“gedit”)创建 cartographer.lua 脚本:
cd $HOME/catkin_ws/src/cartographer_ros/cartographer_ros/configuration_files
gedit cartographer.lua
将以下内容复制粘贴到文件中。
include "map_builder.lua"
include "trajectory_builder.lua"options = {map_builder = MAP_BUILDER,trajectory_builder = TRAJECTORY_BUILDER,map_frame = "map",tracking_frame = "base_link",published_frame = "base_link",odom_frame = "odom",provide_odom_frame = true,publish_frame_projected_to_2d = false,use_odometry = false,use_nav_sat = false,use_landmarks = false,num_laser_scans = 1,num_multi_echo_laser_scans = 0,num_subdivisions_per_laser_scan = 1,num_point_clouds = 0,lookup_transform_timeout_sec = 0.2,submap_publish_period_sec = 0.3,pose_publish_period_sec = 5e-3,trajectory_publish_period_sec = 30e-3,rangefinder_sampling_ratio = 1.,odometry_sampling_ratio = 1.,fixed_frame_pose_sampling_ratio = 1.,imu_sampling_ratio = 1.,landmarks_sampling_ratio = 1.,
}MAP_BUILDER.use_trajectory_builder_2d = trueTRAJECTORY_BUILDER_2D.min_range = 0.05
TRAJECTORY_BUILDER_2D.max_range = 30
TRAJECTORY_BUILDER_2D.missing_data_ray_length = 8.5
TRAJECTORY_BUILDER_2D.use_imu_data = false
TRAJECTORY_BUILDER_2D.ceres_scan_matcher.translation_weight = 0.2
TRAJECTORY_BUILDER_2D.ceres_scan_matcher.rotation_weight = 5
TRAJECTORY_BUILDER_2D.use_online_correlative_scan_matching = true
TRAJECTORY_BUILDER_2D.real_time_correlative_scan_matcher.linear_search_window = 0.1
TRAJECTORY_BUILDER_2D.real_time_correlative_scan_matcher.translation_delta_cost_weight = 1.
TRAJECTORY_BUILDER_2D.real_time_correlative_scan_matcher.rotation_delta_cost_weight = 10
TRAJECTORY_BUILDER_2D.motion_filter.max_angle_radians = math.rad(0.2)
-- for current lidar only 1 is good value
TRAJECTORY_BUILDER_2D.num_accumulated_range_data = 1TRAJECTORY_BUILDER_2D.min_z = -0.5
TRAJECTORY_BUILDER_2D.max_z = 0.5POSE_GRAPH.constraint_builder.min_score = 0.65
POSE_GRAPH.constraint_builder.global_localization_min_score = 0.65
POSE_GRAPH.optimization_problem.huber_scale = 1e2
POSE_GRAPH.optimize_every_n_nodes = 30return options!Note
与其手动修改上述软件包,不如克隆该仓库并安装依赖包。


)
--Java版)


——自建数据集)


)