设置页面:
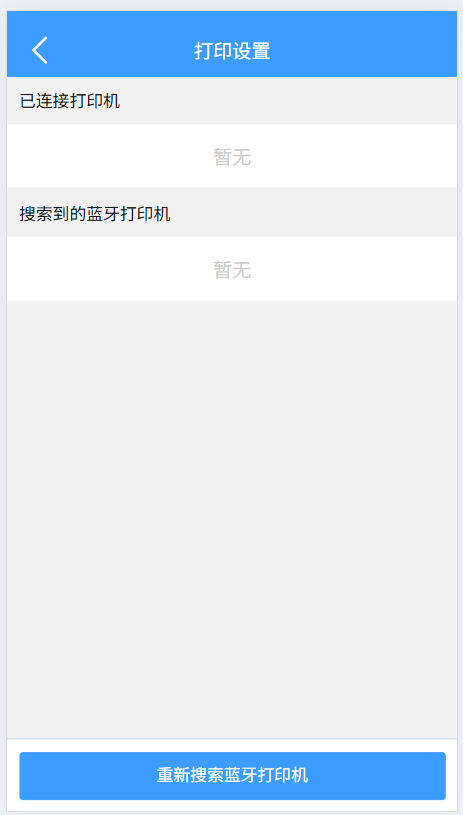
<template><view class="pageBg"><u-navbar leftIconColor="#fff" :leftIconSize="28" title="打印设置" bgColor="#3c9cff" :placeholder="true"@leftClick="$navigateBack"></u-navbar><view class="h10"></view><!-- 蓝牙未开启提示 --><u-alert v-if="!isBlue" type="warning" :show-icon="true" title="未开启蓝牙"description="无法连接蓝牙打印机,请先开启蓝牙!"></u-alert><view class="p10">已连接打印机</view><view><!-- <view v-if="connected" class="list">{{ connectedDeviceName }}</view> --><view v-if="connected || connectedDeviceName" class="list">{{ connectedDeviceName }}</view><view v-else class="list center cloc">暂无</view></view><view class="p10">搜索到的蓝牙打印机</view><view><view v-for="d in devices" :key="d.deviceId" class="list"><view @click="connectDevice(d.deviceId)" class="flexBetween"><view>{{ d.name || '未知设备' }}</view><view style="color:#3c9cff;">添加</view></view></view><view v-if="devices.length === 0" class="list center cloc">暂无</view></view><view class="h100"></view><!-- <view class="float-button p10 grid2"><u-button type="primary" text="重新搜索蓝牙打印机" @click="initAndScan()" color="#3c9cff" /><u-button type="primary" text="一键打印" @click="oneClickPrint()" color="#3c9cff" /></view> --><view class="float-button p10 "><u-button type="primary" text="重新搜索蓝牙打印机" @click="initAndScan()" color="#3c9cff" /></view></view>
</template><script>import {initBluetooth,discoverDevices,connect,print,onPrinterStatus,isBluetoothReady} from "@/utils/printer.js"export default {data() {return {devices: [],connected: false,connectedDeviceId: null,connectedDeviceName: "",reconnecting: false,isBlue: true,scanning: false,}},// async onLoad() {// 	await this.checkBluetooth()// 	if (this.isBlue) {// 		await this.autoReconnect()// 		await this.initAndScan()// 	}// },async onLoad() {await this.checkBluetooth()// ✅ 获取上次打印机信息const lastPrinter = uni.getStorageSync("lastPrinter")console.log('lastPrinter:',lastPrinter)if (lastPrinter && lastPrinter.name) {this.connectedDeviceName = lastPrinter.name}if (this.isBlue) {await this.autoReconnect() // 尝试重连await this.initAndScan()    // 扫描设备}},methods: {/** 检查蓝牙是否可用 */async checkBluetooth() {this.isBlue = await isBluetoothReady()},/** 初始化蓝牙并扫描设备 */async initAndScan() {if (!this.isBlue) {uni.showToast({title: "请先开启蓝牙",icon: "none"})return}if (this.scanning) returnthis.scanning = truetry {await initBluetooth()uni.showLoading({title: '加载中',mask: true,})// 扫描设备this.devices = await discoverDevices(3000) // 扫描3秒// ✅ 获取上次打印机const lastPrinter = uni.getStorageSync("lastPrinter")if (lastPrinter) {// 如果扫描列表里没有上次打印机,就加到最前面if (!this.devices.find(d => d.deviceId === lastPrinter.deviceId)) {this.devices.unshift({deviceId: lastPrinter.deviceId,name: lastPrinter.name || '未知设备'})}}uni.hideLoading()console.log('this.devices:', this.devices)if (this.devices.length === 0) {uni.showToast({title: "未找到设备",icon: "none"})}} catch (err) {console.error("搜索设备失败", err)uni.showToast({title: "搜索设备失败",icon: "none"})} finally {this.scanning = false}},/** 手动连接设备 */async connectDevice(deviceId) {try {await connect(deviceId)this.connected = truethis.connectedDeviceId = deviceIdconst dev = this.devices.find(d => d.deviceId === deviceId)this.connectedDeviceName = dev ? dev.name : deviceIduni.showToast({ title: "连接成功" })// ✅ 保存上次打印机(带名字)uni.setStorageSync("lastPrinter", {deviceId,name: this.connectedDeviceName})this.listenPrinterStatus()this.listenDisconnect()} catch (err) {console.error("连接失败", err)uni.showToast({ title: "连接失败", icon: "none" })}},/** 打印机状态监听 */listenPrinterStatus() {// uni.offBLECharacteristicValueChange()onPrinterStatus(data => {if (data[0] & 0x04) uni.showToast({title: "缺纸",icon: "none"})if (data[0] & 0x08) uni.showToast({title: "开盖",icon: "none"})if (data[0] & 0x10) uni.showToast({title: "过热",icon: "none"})})},/** 监听断开并自动重连 */listenDisconnect() {// uni.offBLEConnectionStateChange()uni.onBLEConnectionStateChange(res => {if (!res.connected && res.deviceId === this.connectedDeviceId && !this.reconnecting) {console.warn("打印机断开,开始自动重连")this.connected = falsethis.reconnecting = truethis.autoReconnect()}})},/** 自动重连上次打印机 */async autoReconnect() {try {const lastPrinter = uni.getStorageSync("lastPrinter")if (!lastPrinter || !lastPrinter.deviceId) {this.reconnecting = falsereturn}uni.showLoading({ title:'加载中', mask:true })// ✅ 优先直接用 deviceId 连接try {await connect(lastPrinter.deviceId)this.connected = truethis.connectedDeviceId = lastPrinter.deviceIdthis.connectedDeviceName = lastPrinter.name || lastPrinter.deviceIduni.hideLoading()uni.showToast({ title: "打印机已重连" })this.listenPrinterStatus()this.listenDisconnect()return} catch (err) {console.warn("直接重连失败,尝试扫描", err)}// ❌ 兜底:扫描设备再匹配const devices = await discoverDevices(3000)uni.hideLoading()const dev = devices.find(d => d.deviceId === lastPrinter.deviceId)if (!dev) {console.warn("未找到上次打印机")this.reconnecting = falsereturn}await connect(dev.deviceId)this.connected = truethis.connectedDeviceId = dev.deviceIdthis.connectedDeviceName = dev.nameuni.showToast({ title: "打印机已重连" })// ✅ 更新存储,保证 name 最新uni.setStorageSync("lastPrinter", {deviceId: dev.deviceId,name: dev.name})this.listenPrinterStatus()this.listenDisconnect()} catch (err) {console.error("自动重连失败", err)} finally {this.reconnecting = falseuni.hideLoading()}},/** 一键打印 */async oneClickPrint() {try {if (!this.connected) {await this.autoReconnect()if (!this.connected) {uni.showToast({title: "未连接打印机",icon: "none"})return}}await print("Hello K329", "https://uniapp.dcloud.io")uni.showToast({title: "打印完成"})} catch (err) {console.error("打印失败", err)uni.showToast({title: "打印失败",icon: "none"})}},},onUnload() {// 页面卸载时解绑事件// uni.offBLECharacteristicValueChange()// uni.offBLEConnectionStateChange()}}
</script><style lang="scss" scoped>.list {border-bottom: 2rpx solid #efefef;background: white;padding: 30rpx;font-size: 32rpx;}.list:active {background: #efefef;}.grid2 {display: flex;align-items: center;}.grid2>* {flex: 1;}.grid2>*:first-child {margin-right: 20rpx;}
</style>
printer.js
let deviceId = null
let writeServiceId = null
let writeCharacteristicId = null
let notifyServiceId = null
let notifyCharacteristicId = null/*** 初始化蓝牙*/
export function initBluetooth() {return new Promise((resolve, reject) => {uni.openBluetoothAdapter({success: resolve,fail: reject})})
}/*** 搜索蓝牙设备*/
export function discoverDevices(scanTime = 3000) {return new Promise((resolve, reject) => {const devices = []uni.startBluetoothDevicesDiscovery({allowDuplicatesKey: true, // 可以重复发现success: () => {console.log("开始扫描蓝牙设备...")uni.onBluetoothDeviceFound((res) => {res.devices.forEach((d) => {if (d.name && !devices.find(x => x.deviceId === d.deviceId)) {devices.push(d)}})})// 扫描指定时间后返回结果setTimeout(() => {uni.stopBluetoothDevicesDiscovery({success: () => {console.log("扫描结束,设备列表:", devices)resolve(devices)},fail: (err) => {console.error("停止扫描失败", err)resolve(devices) // 即使失败也返回已收集的}})}, scanTime)},fail: reject})})
}/*** 连接设备并自动发现写入/状态通道*/
export function connect(deviceId_) {return new Promise((resolve, reject) => {uni.createBLEConnection({deviceId: deviceId_,success: () => {deviceId = deviceId_// ✅ 存储上次使用的打印机// uni.setStorageSync("lastPrinter", deviceId_)console.log("已保存 lastPrinter:", deviceId_)uni.getBLEDeviceServices({deviceId,success: (res) => {let foundWrite = falselet foundNotify = falseres.services.forEach(service => {uni.getBLEDeviceCharacteristics({deviceId,serviceId: service.uuid,success: (res2) => {res2.characteristics.forEach(c => {// 找写入通道if ((c.properties.write || c.properties.writeWithoutResponse) && !foundWrite) {writeServiceId =service.uuidwriteCharacteristicId= c.uuidfoundWrite =trueconsole.log("找到写入通道:",service.uuid, c.uuid)}// 找状态通道if ((c.properties.notify || c.properties.read) && !foundNotify) {notifyServiceId= service.uuidnotifyCharacteristicId= c.uuidfoundNotify =trueconsole.log("找到状态通道:",service.uuid, c.uuid)// 开启状态通知uni.notifyBLECharacteristicValueChange({deviceId,serviceId: service.uuid,characteristicId: c.uuid,state: true,success: () =>console.log("已开启状态通知"),fail: (err) =>console.error("开启状态通知失败:",err)})}})if (foundWrite) resolve()},fail: reject})})},fail: reject})},fail: reject})})
}/*** 打印文本和二维码*/
export function print(text, qrcode) {if (!deviceId || !writeServiceId || !writeCharacteristicId) {return Promise.reject("请先连接打印机")}let cmd = `
SIZE 40 mm,30 mm
GAP 2 mm,0 mm
CLS
TEXT 50,50,"3",0,1,1,"${text}"
`if (qrcode) {cmd += `QRCODE 50,150,L,5,A,0,"${qrcode}"\n`}cmd += `PRINT 1\n`const buffer = str2ab(cmd)return new Promise((resolve, reject) => {uni.writeBLECharacteristicValue({deviceId,serviceId: writeServiceId,characteristicId: writeCharacteristicId,value: buffer,success: resolve,fail: reject})})
}/*** 监听打印机状态*/
export function onPrinterStatus(callback) {uni.onBLECharacteristicValueChange((res) => {const data = new Uint8Array(res.value)console.log("打印机状态数据:", data)callback(data)})
}/*** 字符串转 ArrayBuffer*/
function str2ab(str) {let buf = new ArrayBuffer(str.length)let bufView = new Uint8Array(buf)for (let i = 0; i < str.length; i++) {bufView[i] = str.charCodeAt(i)}return buf
}export async function isBluetoothReady() {return new Promise((resolve) => {uni.openBluetoothAdapter({success: () => {// 延迟 500ms 再获取状态,保证 iOS 能拿到真实值setTimeout(() => {uni.getBluetoothAdapterState({success(res) {resolve(res.available)},fail() {resolve(false)}})}, 500)},fail() {resolve(false)}})})
}export async function oneClickPrint2(text = "Hello K329", qrcode = "https://uniapp.dcloud.io") {try {// 1. 蓝牙是否开启const ready = await isBluetoothReady()if (!ready) throw new Error("蓝牙未开启")// 2. 初始化蓝牙适配器await initBluetooth()// 3. 获取上次打印机const lastPrinter = uni.getStorageSync("lastPrinter")// console.log("lastPrinter:", lastPrinter, "打印机上次")if (!lastPrinter) throw new Error("未找到已连接打印机")// 4. 直接尝试连接await connect(lastPrinter)// 5. 打印await print(text, qrcode)return true} catch (err) {console.error("一键打印失败", err)throw err}
}
/** 一键打印 */
export async function oneClickPrint(text = "Hello K329", qrcode = "https://uniapp.dcloud.io") {try {// 1. 蓝牙是否开启const ready = await isBluetoothReady()if (!ready) {uni.showToast({ title: "蓝牙未开启", icon: "none" })return}// 2. 初始化蓝牙await initBluetooth()// 3. 检查是否已连接if (!this.connected) {const lastPrinter = uni.getStorageSync("lastPrinter")if (!lastPrinter || !lastPrinter.deviceId) {uni.showToast({ title: "未连接打印机", icon: "none" })return}// 尝试直接连接上次打印机try {await connect(lastPrinter.deviceId)this.connected = truethis.connectedDeviceId = lastPrinter.deviceIdthis.connectedDeviceName = lastPrinter.name || lastPrinter.deviceIdthis.listenPrinterStatus()this.listenDisconnect()uni.showToast({ title: "打印机已重连" })} catch (err) {console.warn("自动连接上次打印机失败,需要手动连接", err)uni.showToast({ title: "打印机未连接", icon: "none" })return}}// 4. 打印await print(text, qrcode)uni.showToast({ title: "打印完成" })} catch (err) {console.error("一键打印失败", err)uni.showToast({ title: "打印失败", icon: "none" })}
}
一键打印:
<view class="p10"><u-button type="primary" class="lockoutClass" text="打印" :color="bgColor" @click="printNow()" /></view>
async printNow() {try {uni.showLoading({title:'打印中',mask:true,})await this.$printer.oneClickPrint("测试文本", "https://example.com/qrcode")uni.hideLoading()uni.showToast({title: "打印完成"})} catch (err) {console.log('err:',err)uni.showToast({title: "打印失败,请检查蓝牙或者打印机!",icon: "none"})}},
)


1:LTC改进成CFC思路)


)

:UART 协议 —— 异步串行通信的底层逻辑)


