一、MyBatis Generator
为 MyBastis 框架设计的代码生成工具,简化持久层编码工作。根据数据库表自动生成 Java 实体类、Mapper 接口、SQL 的 xml 文件。让开发者专注于业务逻辑。
1、引入插件
MyBatis 官网搜索 MyBatis Generator 插件:Running MyBatis Generator With Maven – MyBatis Generator Core![]() https://mybatis.org/generator/running/runningWithMaven.html
https://mybatis.org/generator/running/runningWithMaven.html
<plugin><groupId>org.mybatis.generator</groupId><artifactId>mybatis-generator-maven-plugin</artifactId><version>1.3.6</version><executions><execution><id>Generate MyBatis Artifacts</id><phase>deploy</phase><goals><goal>generate</goal></goals></execution></executions><configuration><!--generator配置文件所在位置--><configurationFile>src/main/resources/generator/generatorConfig.xml</configurationFile><!-- 允许覆盖生成的文件;xml不会覆盖, 采用追加的方式--><overwrite>true</overwrite><verbose>true</verbose><!--将当前pom的依赖项添加到生成器的类路径中--><includeCompileDependencies>true</includeCompileDependencies></configuration><!--该插件的依赖,在 <dependencies> 中引入的它识别不到--><dependencies><dependency><groupId>mysql</groupId><artifactId>mysql-connector-java</artifactId><version>8.0.33</version></dependency></dependencies></plugin>
2、修改 generatorConfig.xml 文件
<?xml version="1.0" encoding="UTF-8"?>
<!DOCTYPE generatorConfigurationPUBLIC "-//mybatis.org//DTD MyBatis Generator Configuration 1.0//EN""http://mybatis.org/dtd/mybatis-generator-config_1_0.dtd">
<!-- 配置生成器 -->
<generatorConfiguration><!-- 一个数据库一个context --><context id="MysqlTables" targetRuntime="MyBatis3Simple"><!--禁用自动生成的注释--><commentGenerator><property name="suppressDate" value="true"/><property name="suppressAllComments" value="true" /></commentGenerator><!--数据库连接信息--><jdbcConnection driverClass="com.mysql.jdbc.Driver"connectionURL="jdbc:mysql://127.0.0.1:3306/book_test?serverTimezone=Asia/Shanghai&nullCatalogMeansCurrent=true"userId="root"password="root"></jdbcConnection><!-- 生成实体类, 配置路径 --><javaModelGenerator targetPackage="com.edu.generator.model" targetProject="src/main/java" ><property name="enableSubPackages" value="false"/><property name="trimStrings" value="true"/></javaModelGenerator><!-- 生成mapxml文件 --><sqlMapGenerator targetPackage="generatorMapper" targetProject="src/main/resources" ><property name="enableSubPackages" value="false" /></sqlMapGenerator><!-- 生成mapxml对应client,也就是接口dao --><javaClientGenerator targetPackage="com.edu.generator.mapper" targetProject="src/main/java" type="XMLMAPPER" ><property name="enableSubPackages" value="false" /></javaClientGenerator><!-- table可以有多个,tableName表示要匹配的数据库表 --><table tableName="user_info" domainObjectName="UserInfo" enableSelectByExample="true"enableDeleteByExample="true" enableDeleteByPrimaryKey="true" enableCountByExample="true"enableUpdateByExample="true"><!-- 类的属性是否用数据库中的真实字段名做为属性名, 不指定这个属性会自动转换 _ 为驼峰命名规则 --><property name="useActualColumnNames" value="false" /><!-- 数据库表主键 --><generatedKey column="id" sqlStatement="Mysql" identity="true" /></table><table tableName="book_info" domainObjectName="BookInfo" enableSelectByExample="true"enableDeleteByExample="true" enableDeleteByPrimaryKey="true" enableCountByExample="true"enableUpdateByExample="true"><!-- 类的属性是否用数据库中的真实字段名做为属性名, 不指定这个属性会自动转换 _ 为驼峰命名规则 --><property name="useActualColumnNames" value="false" /><!-- 数据库表主键 --><generatedKey column="id" sqlStatement="Mysql" identity="true" /></table></context>
</generatorConfiguration>- targetRuntime="MyBatis3Simple":"MyBatis3Simple" 生成的 SQL 的 xml 语句比较简单;"MyBatis3" 比较复杂。
- targetPackage="com.edu.generator.model":生成在哪个包。
- tableName="user_info":数据库对应的表名。
- domainObjectName="BookInfo":对应的实体类名。
- <generatedKey column="id":主键名。
- <property name="useActualColumnNames" value="false" />:属性名自动转换成驼峰命名规则。
只生成实体类的版本:
<?xml version="1.0" encoding="UTF-8"?>
<!DOCTYPE generatorConfigurationPUBLIC "-//mybatis.org//DTD MyBatis Generator Configuration 1.0//EN""http://mybatis.org/dtd/mybatis-generator-config_1_0.dtd">
<!-- 配置生成器 -->
<generatorConfiguration><!-- 一个数据库一个context --><context id="MysqlTables" targetRuntime="MyBatis3Simple"><!-- 禁用自动生成的注释 --><commentGenerator><property name="suppressDate" value="true"/><property name="suppressAllComments" value="true" /></commentGenerator><!-- 数据库连接信息 --><jdbcConnection driverClass="com.mysql.jdbc.Driver"connectionURL="jdbc:mysql://127.0.0.1:3306/mybatis_test?serverTimezone=Asia/Shanghai&nullCatalogMeansCurrent=true"userId="root"password="123456"></jdbcConnection><!-- 生成实体类配置 --><javaModelGenerator targetPackage="com.edu.mybatis.plus.model" targetProject="src/main/java" ><property name="enableSubPackages" value="false"/><property name="trimStrings" value="true"/></javaModelGenerator><!-- 移除SQL映射文件生成器(不生成Mapper XML) --><!-- 移除Java客户端生成器(不生成Mapper接口) --><!-- 表配置 --><table tableName="user_info" domainObjectName="UserInfo"><property name="useActualColumnNames" value="false" /><generatedKey column="id" sqlStatement="Mysql" identity="true" /></table></context>
</generatorConfiguration>
3、生成代码
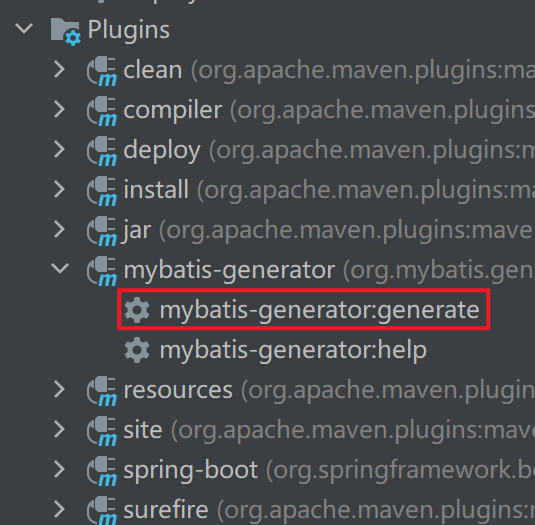
在 maven 中运行插件,自动生成代码:
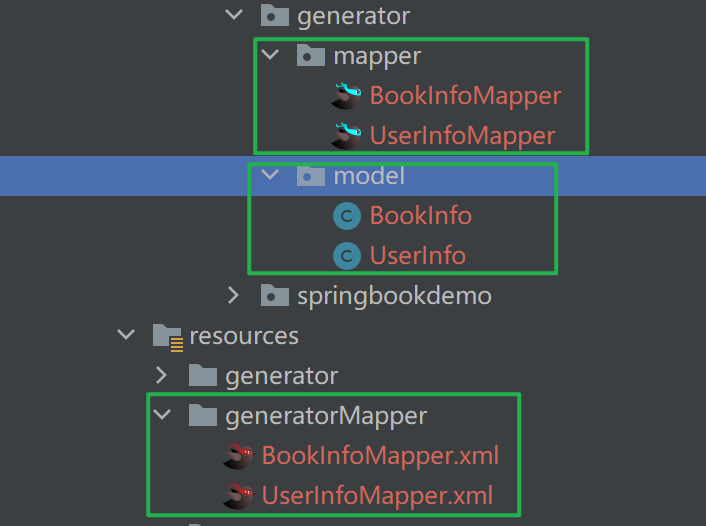
生成的文件:
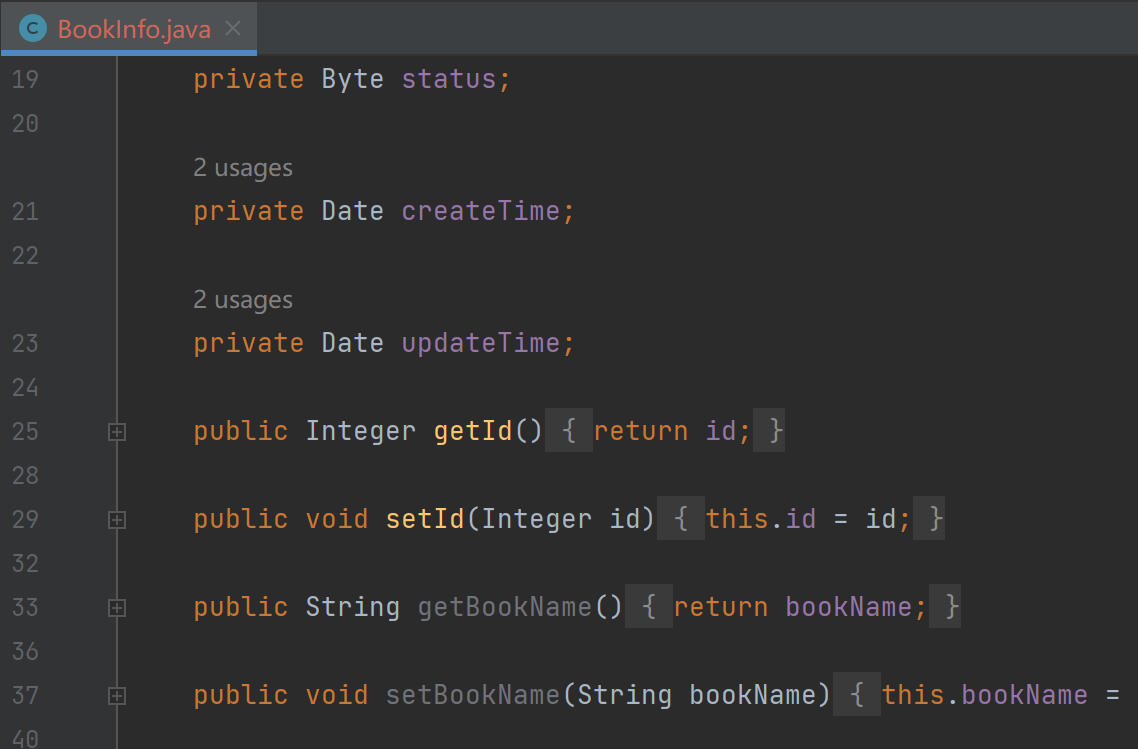
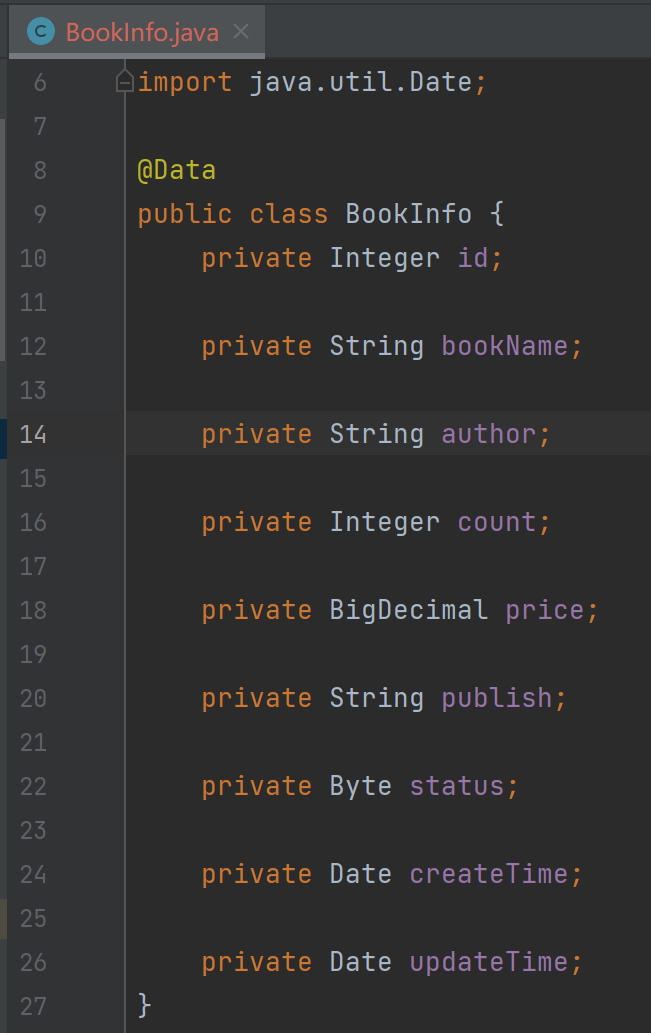
实体类把 getter、setter 都生成了,为了好看,可以调整为 @Data:
Mapper 接口、xml 文件生成了一些基础的数据库操作。(不建议用,mxl 文件代码太乱了,看着很复杂)
该插件的使用,需要配置很多东西,比如数据库连接的信息,但是这些信息已经在 spring boot 的配置文件中配置过了,因此该插件还不够方便。对于 mapper、xml 的编写,Mybatis-plus 框架才是我们学习的重点。用用 MyBatis Generator 的实体类自动生成即可。
二、MyBatis-plus
MyBatis-plus 在 MyBatis 的基础上扩展功能,跟 MyBatis 不冲突。直接在 Spring Boot 项目的POM 文件中引入依赖即可。
官方文档:
快速开始 | MyBatis-Plus![]() https://baomidou.com/getting-started/
https://baomidou.com/getting-started/
1、快速上手
创建一个 Spring Boot 项目:
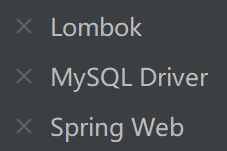
引入依赖:spring boot3 对应的版本
<dependency><groupId>com.baomidou</groupId><artifactId>mybatis-plus-spring-boot3-starter</artifactId><version>3.5.12</version>
</dependency>
配置数据库连接信息(.yml)。
在启动类中加入 @MapperScan,指定要扫描的 Mapper 文件路径。或者每个 mapper 类加上 @Mapper,二选其一。

创建要操作的表对应的实体类。
编写 Mapper 接口类:

2、简单 CRUD 单元测试
(1)查
@Testpublic void testSelectAll() {System.out.println(("----- 查询所有 ------"));List<UserInfo> userList = userInfoMapper.selectList(null);userList.forEach(System.out::println);}@Testvoid testSelectById(){System.out.println(("----- 按 主键 查询 ------"));UserInfo userInfo = userInfoMapper.selectById(2);System.out.println(userInfo);}@Testvoid testSelectByIds(){System.out.println(("----- 按 主键 集合查询 ------"));List<UserInfo> userInfos = userInfoMapper.selectByIds(List.of(1,2));userInfos.forEach(System.out::println);}(2)增
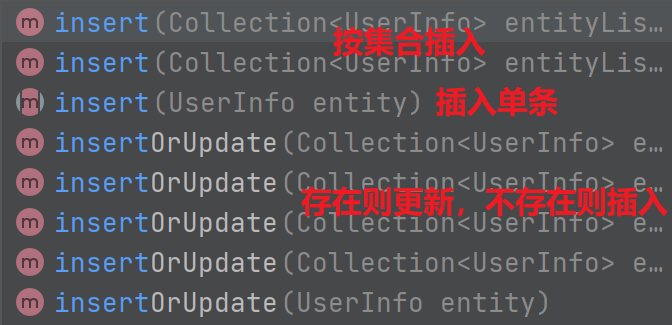
@Testvoid testInsert(){System.out.println(("----- 插入一条数据 ------"));UserInfo userInfo = new UserInfo();userInfo.setUserName("Jay");userInfo.setPassword("Chou");int insert = userInfoMapper.insert(userInfo);System.out.println("影响行数:"+ insert);}id 生成了随机数:
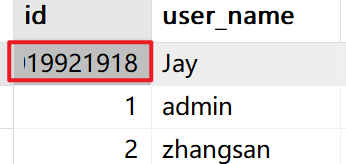
想自增需要使用 @TableId 设置:

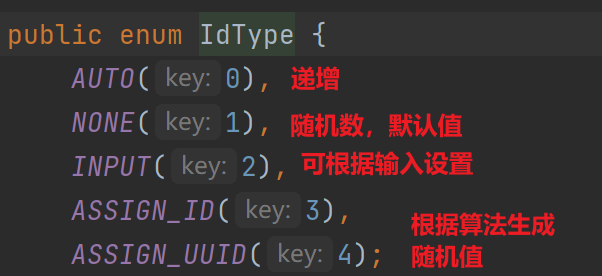
id 会从最大值 2 开始自增:
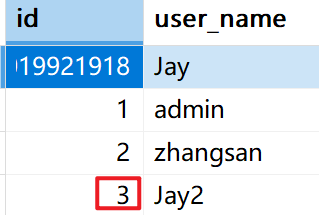
如果想修改最大值:表上右键 >> 设计表 >> 选项 修改

(3)改
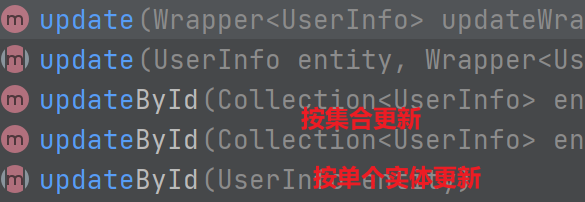
@Testvoid testUpdate(){System.out.println(("----- 按 主键 更新一条数据 ------"));UserInfo userInfo = new UserInfo();userInfo.setId(2);userInfo.setUserName("lisi");userInfo.setDeleteFlag(1);userInfoMapper.updateById(userInfo);}(4)删
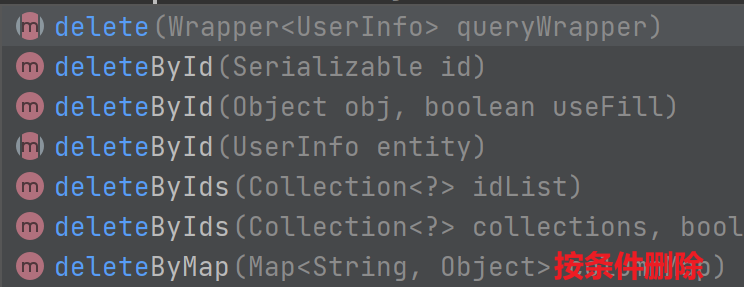
@Testvoid testDelete(){System.out.println(("----- 按 主键 删除一条数据 ------"));userInfoMapper.deleteById(-2019921918);}3、命名映射注解
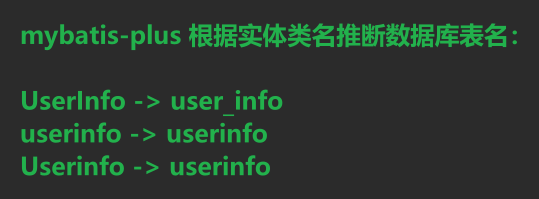
MyBatis-plus 如何将类名、属性名与数据库表、主键字段、普通字段对应:
- 根据实体类名推断表名。(@TableName)
- 默认 id 属性是主键。(@TableId)
- 驼峰规则的属性名对应的蛇形命名,就是表字段。(@TableField)
- 如果 java 命名不符合自动对应的的规则,可以用注解进行绑定。
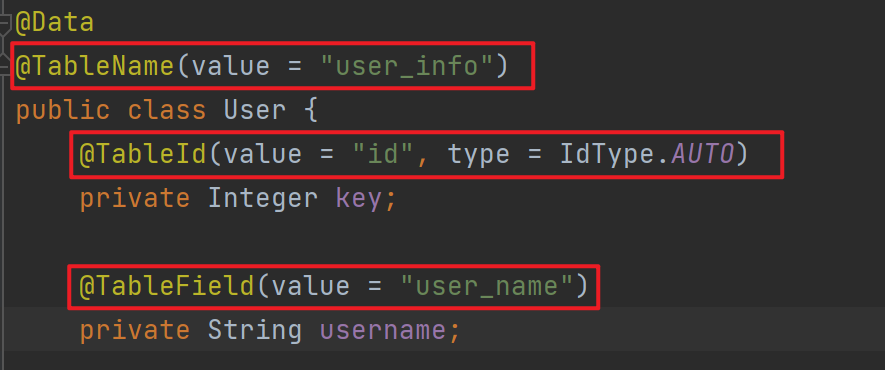
4、打印日志
把 mybatis 改成 mybatis-plus 即可:
mybatis-plus:configuration: # 配置打印 MyBatis ⽇志log-impl: org.apache.ibatis.logging.stdout.StdOutImpl5、自动生成代码(了解)
参考:代码生成器 | MyBatis-Plus
引入依赖:generator + 模板引擎
<dependency><groupId>com.baomidou</groupId><artifactId>mybatis-plus-generator</artifactId><version>3.5.12</version></dependency><dependency><groupId>org.freemarker</groupId><artifactId>freemarker</artifactId><version>2.3.31</version></dependency>自动生成代码:
public void test() {FastAutoGenerator.create("jdbc:mysql://127.0.0.1:3306/book_test?characterEncoding=utf8" +"&useSSL=false&allowPublicKeyRetrieval=true","root", "123456").globalConfig(builder -> builder.outputDir(Paths.get(System.getProperty("user.dir")) + "/src/main/java")).packageConfig(builder -> builder.parent("com.edu.mybatis.plus.generator").entity("entity").mapper("mapper").service("service").xml("mapper.xml")).strategyConfig(builder -> builder.entityBuilder().enableLombok()).templateEngine(new FreemarkerTemplateEngine()).execute();}6、复杂 CRUD 操作
(1)什么是条件构造器
条件构造器(Wrapper 类)允许链式构造条件(用 . 的方式直接引用条件构造方法),避免编写复杂 SQL,同时减少 SQL 注入风险。
- AbstractWrapper:抽象类,提供 Wrapper 类共有的方法和属性。
- QueryWrapper:构造查询条件。
- UpdateWrapper:构造更新条件,可以不用构造实体类设置 set。
- LambdaQueryWrapper:基于 Lambda 表达式构造查询条件。
- LambdaUpdateWrapper:基于 Lambda 表达式构造更新条件。
AbstractWrapper 实现了 Compare 接口,包含了各种条件构造器,比如大于、等于、模糊查询等,这些操作是四种 Wrapper 共有的:(更多详情参考官方文档)
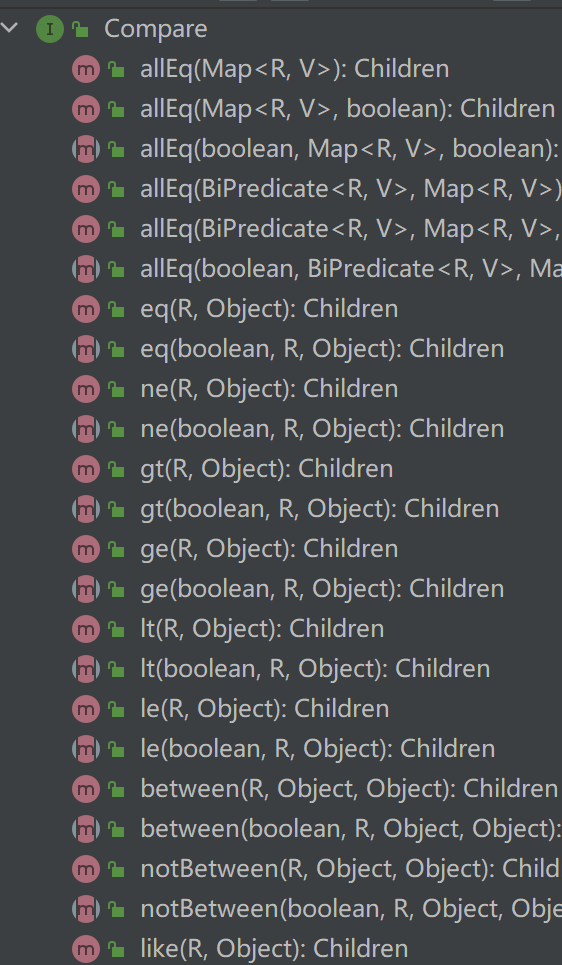
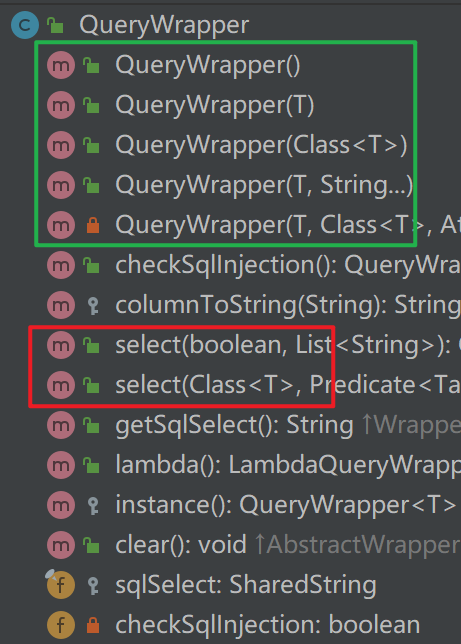
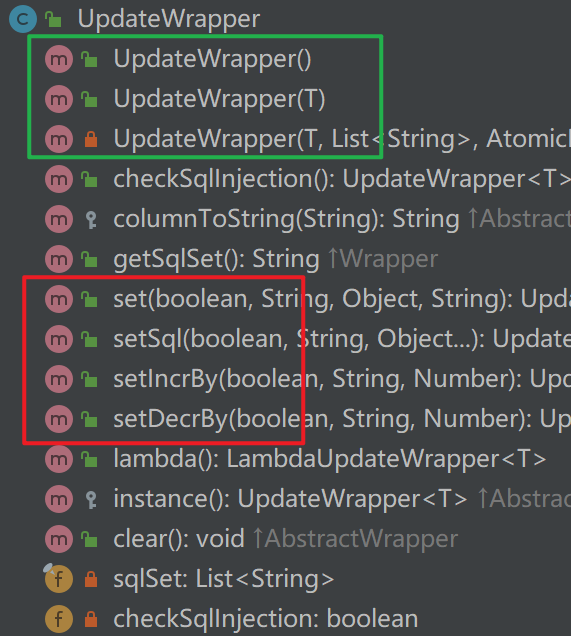
(Lambda)QueryWrapper 和 (Lambda)UpdateWrapper 的不同之处就是红框的部分。绿框是构造函数,其余方法都是差不多一样的。
(2)QueryWrapper
增删改查都能用 QueryWrapper 实现。
查询:
SELECT id,user_name,password FROM user_info WHERE delete_flag = 0 AND user_name
LIKE "%min%"
@Testvoid testQueryWrapper(){QueryWrapper<UserInfo> queryWrapper = new QueryWrapper<>();queryWrapper.select("id", "user_name", "password").eq("delete_flag", 0).like("user_name", "min");List<UserInfo> userList = userInfoMapper.selectList(queryWrapper);userList.forEach(System.out::println);}更新:需要构造实体类,设置修改值。
UPDATE user_info SET delete_flag=1 WHERE id < 3 @Testvoid testQueryWrapper2(){QueryWrapper<UserInfo> queryWrapper = new QueryWrapper<>();UserInfo userInfo = new UserInfo();userInfo.setDeleteFlag(1);queryWrapper.lt("id", 3);userInfoMapper.update(userInfo, queryWrapper);}删:
DELETE FROM user_info WHERE user_name = Jay2 @Testvoid testQueryWrapper3(){QueryWrapper<UserInfo> queryWrapper = new QueryWrapper<>();queryWrapper.eq("user_name", "Jay2");userInfoMapper.delete(queryWrapper);}(3)UpdateWrapper
更新:不用构造实体类,直接 set。
UPDATE user_info SET delete_flag=0 WHERE id IN (1,2) @Testvoid testUpdateWrapper(){UpdateWrapper<UserInfo> updateWrapper = new UpdateWrapper<>();updateWrapper.set("delete_flag", 0).in("id", List.of(1,2));userInfoMapper.update(updateWrapper);}直接 set sql 语句更新:
UPDATE user_info SET delete_flag=delete_flag+1 WHERE id IN (1,2) @Testvoid testUpdateWrapper2(){UpdateWrapper<UserInfo> updateWrapper = new UpdateWrapper<>();updateWrapper.setSql("delete_flag = delete_flag + 1").in("id", List.of(1,2));userInfoMapper.update(updateWrapper);}(4)LambdaQueryWrapper
字段名容易写错,Lambda 的版本就是用 实体类名::get属性名来替代字段名字符串。
可以直接 new Lambda 版本,或者 new 普通版本再使用 lambda 方法转为 Lambda 版本。
SQL:
SELECT id,user_name,password FROM user_info WHERE delete_flag = 0 AND user_name
LIKE "%min%"
@Testvoid testLambdaQueryWrapper(){
// LambdaQueryWrapper<UserInfo> lambdaQueryWrapper = new LambdaQueryWrapper<>();QueryWrapper<UserInfo> queryWrapper = new QueryWrapper<>();queryWrapper.lambda().select(UserInfo::getId, UserInfo::getUserName, UserInfo::getPassword).eq(UserInfo::getDeleteFlag, 0).like(UserInfo::getUserName, "min");List<UserInfo> userList = userInfoMapper.selectList(queryWrapper);userList.forEach(System.out::println);}(5)LambdaUpdateWrapper
SQL:
UPDATE user_info SET delete_flag=0 WHERE id IN (1,2) @Testvoid testLambdaUpdateWrapper(){UpdateWrapper<UserInfo> updateWrapper = new UpdateWrapper<>();updateWrapper.lambda().set(UserInfo::getDeleteFlag, 1).in(UserInfo::getId, List.of(1,2));userInfoMapper.update(updateWrapper);}setIncrBy:递增
setDecrBy:递减
示例:
UPDATE user_info SET delete_flag = delete_flag + 1 @Testvoid testLambdaUpdateWrapper(){UpdateWrapper<UserInfo> updateWrapper = new UpdateWrapper<>();updateWrapper.lambda().set(UserInfo::getDeleteFlag, 1).in(UserInfo::getId, List.of(1,2));userInfoMapper.update(updateWrapper);}(6)自定义 SQL
MyBatis-plus 框架提供的操作不能满足所有的需求,我们可以利用 Wrapper 构造条件,在 Mapper 自定义 SQL。
- 条件构造器传参:参数名 ew 或者重命名 @Param(Constants.WRAPPER)。
![]()
- 构造器使用:${ew.customSqlSegment} 引用。
SQL:
select id,username,password FROM user_info WHERE user_name = "admin"注解方式:
@Select("SELECT id, user_name, password FROM user_info ${ew.customSqlSegment}")UserInfo selectByCustom(@Param(Constants.WRAPPER) Wrapper<UserInfo> wrapper);XML 方式:
<select id="selectByCustom2" resultType="com.edu.mybatis.plus.model.UserInfo">SELECT id, user_name, password FROM user_info ${ew.customSqlSegment}</select>测试代码:
@Testvoid testSelectByCustom(){QueryWrapper<UserInfo> queryWrapper = new QueryWrapper<>();queryWrapper.lambda().eq(UserInfo::getUserName, "admin");userInfoMapper.selectByCustom(queryWrapper);}


等级考试试卷-客观题(2023年3月))


)


概率论基础知识-伽马函数·上)


