nginx源码编译
本实验采用nginx源码编译的安装方式,需要准备一个tar包,可从nginx官网上下载。
下载地址:nginx: download![]() https://nginx.org/en/download.html
https://nginx.org/en/download.html
将下载好的压缩包传到虚拟机中的自定义目录下
[root@webserver ~]# ls
anaconda-ks.cfg  Documents  Music                Pictures  rh9.3.repo  Videos
Desktop          Downloads  nginx-1.24.0.tar.gz  Public    Templates
解压:
[root@webserver ~]# tar zxf nginx-1.24.0.tar.gz解压后,进入nginx-1.24.0/目录下可看到以下目录文件
[root@webserver ~]# cd nginx-1.24.0/
[root@webserver nginx-1.24.0]# ls
auto  CHANGES  CHANGES.ru  conf  configure  contrib  html  LICENSE  man  README  src
其中各个目录作用如下
构建与配置相关
-
auto/
作用:包含大量用于configure脚本的辅助脚本和配置文件。-
定义了不同操作系统、编译器、模块的检测逻辑。
-
比如
auto/cc/下是编译器检测,auto/modules是模块配置。 -
用户无需手动修改,由
configure自动调用。
-
-
configure
作用:Nginx 的核心配置脚本(可执行文件)。-
运行
./configure会检测系统环境、生成编译所需的Makefile。 -
通过参数(如
--prefix、--with-http_ssl_module)定制功能。
-
-
CHANGES
作用:英文版更新日志,记录每个版本的功能变更、修复的Bug、新增特性(按版本倒序排列)。 -
CHANGES.ru
作用:俄文版更新日志(Nginx 作者 Igor Sysoev 是俄罗斯人),内容与CHANGES一致,但面向俄语用户。 -
LICENSE
作用:Nginx 的许可证文件(2-Clause BSD License),允许自由使用、修改和分发。 -
README
作用:简洁的项目介绍,通常包含编译安装的快速指南和官方文档链接。 -
man/
作用:Nginx 的手册页(Manual Pages),包含nginx.8等文件。-
安装后可通过
man nginx查看命令行用法。
-
-
conf/
作用:存放默认的示例配置文件。-
如
nginx.conf(主配置)、fastcgi.conf(FastCGI 配置模板)。 -
安装时会被复制到
--prefix/conf/(默认/usr/local/nginx/conf/)。
-
-
src/
作用:Nginx 源代码的核心目录,按模块分层:-
src/core/:核心代码(如主函数、内存管理)。 -
src/http/:HTTP 模块(处理 Web 请求)。 -
src/mail/:邮件代理模块(POP3/IMAP/SMTP)。 -
src/stream/:TCP/UDP 代理模块(1.9.0+ 新增)。
-
-
html/
作用:默认的静态网页文件:-
index.html(欢迎页)和50x.html(错误页)。 -
安装后位于
--prefix/html/,是 Nginx 初始测试时访问的页面。
-
#创建nginx服务使用的用户
useradd -s /sbin/nologin -M nginx   -s /sbin/nologin为禁止远程登陆  -M为不创建家目录#安装环境所需要的软件
# dnf install gcc pcre-devel zlib-devel openssl-devel -y
#检测环境
./configure --prefix=/usr/local/nginx \--user=nginx \--group=nginx \--with-http_ssl_module \--with-http_v2_module \--with-http_realip_module \--with-http_stub_status_module \--with-http_gzip_static_module \--with-pcre \--with-stream \--with-stream_ssl_module \--with-stream_realip_module#缩小安装,在nginx目录下
cd nginx-1.24.0/
ls
auto  CHANGES  CHANGES.ru  conf  configure  contrib  html  LICENSE  Makefile  man  objs  README  src
vim auto/cc/gcc
# debug
#CFLAGS="$CFLAGS -g"	---将此行注释掉即可#检测完毕后编译
make#安装编译完成后的可执行文件和库文件以及配置文件到指定目录下
make install
nginx平滑升级和回滚
平滑升级需要两个不同版本的nginx包存在
[root@webserver sbin]# curl -I 192.168.75.10 ---查看nginx版本
HTTP/1.1 200 OK
Server: nginx/1.24.0
Date: Thu, 24 Jul 2025 02:29:25 GMT
Content-Type: text/html
Content-Length: 14
Last-Modified: Thu, 24 Jul 2025 02:12:36 GMT
Connection: keep-alive
ETag: "68819694-e"
Accept-Ranges: bytes[root@webserver sbin]# cp -p nginx nginx.old ---将24版nginx备份[root@webserver sbin]# ls
nginx nginx.old[root@webserver sbin]# /bin/cp -f /root/nginx-1.26.1/objs/nginx /usr/local/sbin/nginx ---将26版nginx放到该目录下[root@webserver sbin]# ps aux | grep nginx ---查看进程
root 2715 0.0 0.0 4416 360 ? Ss 10:36 0:00 nginx: master process nginx
nobody 2716 0.0 0.2 12624 5172 ? S 10:36 0:00 nginx: worker process
root 2718 0.0 0.1 221664 2296 pts/0 S+ 10:36 0:00 grep --color= auto nginx[root@webserver sbin]# kill -USR2 2715(旧服务master进程号) ---重新加载配置文件、启用新的工作进程(只启动进程,不监听端口),以实现平滑升级而不导致服务中断。[root@webserver sbin]#
[root@webserver sbin]# ps aux | grep nginx
root 2715 0.0 0.1 4416 1844 ? Ss 10:36 0:00 nginx: master process nginx
nobody 2716 0.0 0.2 12624 5172 ? S 10:36 0:00 nginx: worker process
root 2720 0.0 0.1 4420 2516 ? S 10:36 0:00 nginx: master process nginx
nobody 2721 0.0 0.2 12624 5160 ? S 10:36 0:00 nginx: worker process
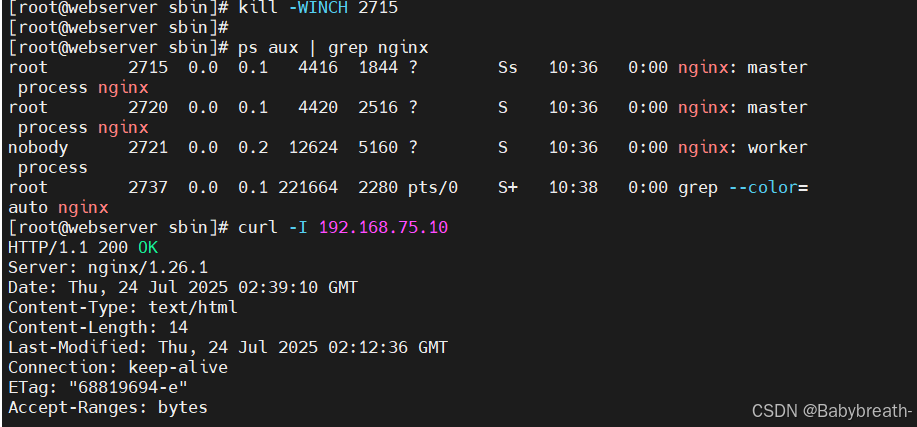
root 2723 0.0 0.1 221664 2296 pts/0 S+ 10:36 0:00 grep --color= auto nginx[root@webserver sbin]# kill -WINCH 2715 ---回收旧版本进程
[root@webserver sbin]#
[root@webserver sbin]# ps aux | grep nginx
root 2715 0.0 0.1 4416 1844 ? Ss 10:36 0:00 nginx: master process nginx
root 2720 0.0 0.1 4420 2516 ? S 10:36 0:00 nginx: master process nginx
nobody 2721 0.0 0.2 12624 5160 ? S 10:36 0:00 nginx: worker process
root 2737 0.0 0.1 221664 2280 pts/0 S+ 10:38 0:00 grep --color= auto nginx[root@webserver sbin]# curl -I 192.168.75.10
HTTP/1.1 200 OK
Server: nginx/1.26.1 #版本更新成功
Date: Thu, 24 Jul 2025 02:39:10 GMT
Content-Type: text/html
Content-Length: 14
Last-Modified: Thu, 24 Jul 2025 02:12:36 GMT
Connection: keep-alive
ETag: "68819694-e"
Accept-Ranges: bytes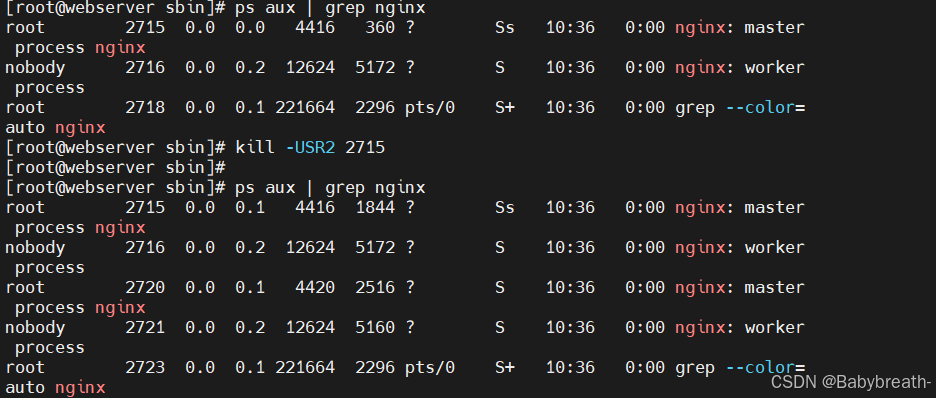
nginx回滚
[root@webserver sbin]# curl -I 192.168.75.10
HTTP/1.1 200 OK
Server: nginx/1.26.1
Date: Thu, 24 Jul 2025 03:05:58 GMT
Content-Type: text/html
Content-Length: 14
Last-Modified: Thu, 24 Jul 2025 02:12:36 GMT
Connection: keep-alive
ETag: "68819694-e"
Accept-Ranges: bytes[root@webserver sbin]# ll
total 9400
-rwxr-xr-x 1 root root 3940656 Jul 24 10:35 nginx
-rwxr-xr-x 1 root root 5678264 Jul 23 15:40 nginx.old[root@webserver sbin]# mv nginx nginx.new
[root@webserver sbin]#
[root@webserver sbin]# mv nginx.old nginx
[root@webserver sbin]# ll
total 9400
-rwxr-xr-x 1 root root 5678264 Jul 23 15:40 nginx
-rwxr-xr-x 1 root root 3940656 Jul 24 10:35 nginx.new[root@webserver sbin]# ps aux | grep nginx
root 2795 0.0 0.1 9864 2496 ? Ss 11:01 0:00 nginx: master process nginx
root 2822 0.0 0.1 4420 2516 ? S 11:04 0:00 nginx: master process nginx
nobody 2823 0.0 0.2 12624 5180 ? S 11:04 0:00 nginx: worker process
root 2849 0.0 0.1 221664 2280 pts/0 S+ 11:06 0:00 grep --color=auto nginx[root@webserver sbin]# kill -HUP 2795 ---拉起旧版本master进程[root@webserver sbin]# ps aux | grep nginx
root 2795 0.0 0.1 9864 2496 ? Ss 11:01 0:00 nginx: master process nginx
root 2822 0.0 0.1 4420 2516 ? S 11:04 0:00 nginx: master process nginx
nobody 2823 0.0 0.2 12624 5180 ? S 11:04 0:00 nginx: worker process
nginx 2850 0.0 0.2 13760 4756 ? S 11:07 0:00 nginx: worker process
root 2852 0.0 0.1 221664 2296 pts/0 S+ 11:07 0:00 grep --color=auto nginx[root@webserver sbin]# kill -WINCH 2822 ---回收新版本master进程[root@webserver sbin]# ps aux | grep nginx
root 2795 0.0 0.1 9864 2496 ? Ss 11:01 0:00 nginx: master process nginx
root 2822 0.0 0.1 4420 2516 ? S 11:04 0:00 nginx: master process nginx
nginx 2850 0.0 0.2 13760 4756 ? S 11:07 0:00 nginx: worker process
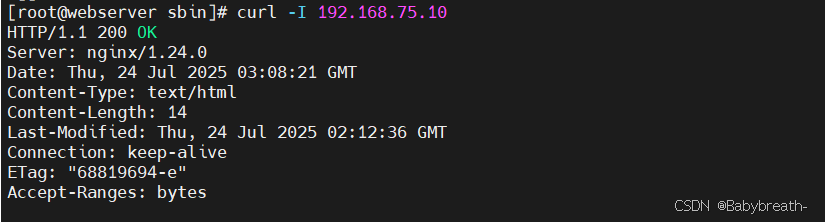
root 2854 0.0 0.1 221664 2300 pts/0 S+ 11:08 0:00 grep --color=auto nginx[root@webserver sbin]# curl -I 192.168.75.10
HTTP/1.1 200 OK
Server: nginx/1.24.0
Date: Thu, 24 Jul 2025 03:08:21 GMT
Content-Type: text/html
Content-Length: 14
Last-Modified: Thu, 24 Jul 2025 02:12:36 GMT
Connection: keep-alive
ETag: "68819694-e"
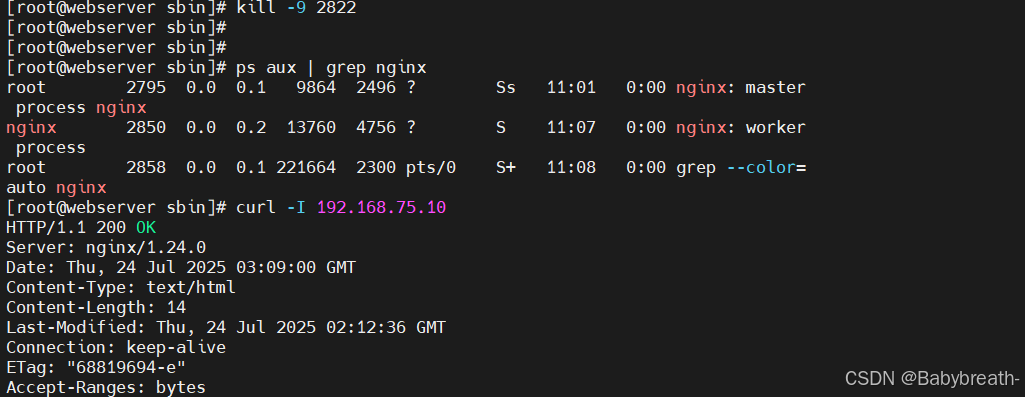
Accept-Ranges: bytes[root@webserver sbin]# kill -9 2822 ---[root@webserver sbin]# ps aux | grep nginx
root 2795 0.0 0.1 9864 2496 ? Ss 11:01 0:00 nginx: master process nginx
nginx 2850 0.0 0.2 13760 4756 ? S 11:07 0:00 nginx: worker process
root 2858 0.0 0.1 221664 2300 pts/0 S+ 11:08 0:00 grep --color=auto nginx[root@webserver sbin]# curl -I 192.168.75.10
HTTP/1.1 200 OK
Server: nginx/1.24.0
Date: Thu, 24 Jul 2025 03:09:00 GMT
Content-Type: text/html
Content-Length: 14
Last-Modified: Thu, 24 Jul 2025 02:12:36 GMT
Connection: keep-alive
ETag: "68819694-e"
Accept-Ranges: bytes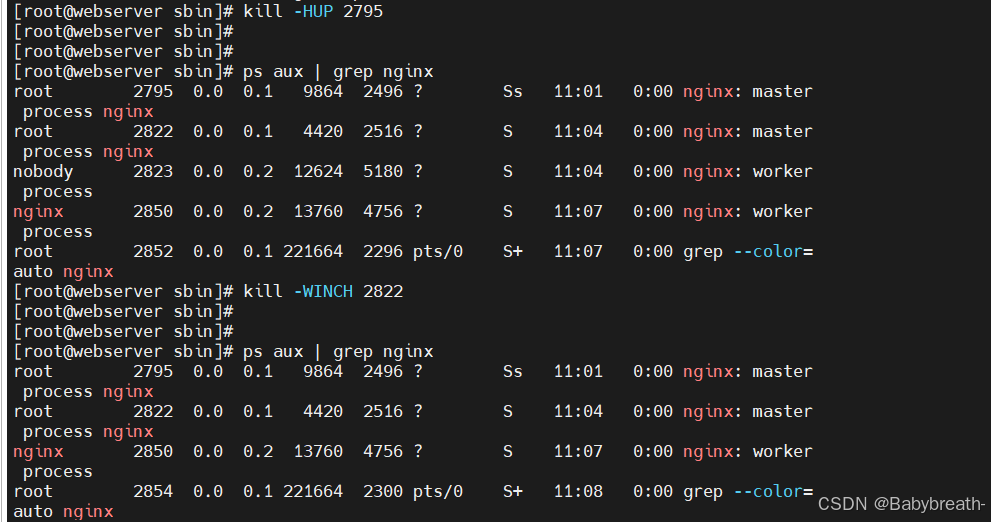
源码编译nginx启用system命令
#在浏览器中访问
https://mailman.nginx.org/pipermail/nginx/2017-April/053368.html#复制配置文件并更改
[root@wb-nginx nginx-1.26.1]# vim /etc/systemd/system/nginx.service
[Unit]
Description=The NGINX HTTP and reverse proxy server
After=syslog.target network.target remote-fs.target nss-lookup.target[Service]
Type=forking
PIDFile=/run/nginx.pid	---改为当前nginx.pid的目录
ExecStartPre=/usr/sbin/nginx -t		---改为当前nginx所在目录
ExecStart=/usr/sbin/nginx		---改为当前nginx所在目录
ExecReload=/bin/kill -s HUP $MAINPID
ExecStop=/bin/kill -s QUIT $MAINPID
PrivateTmp=true[Install]
WantedBy=multi-user.target#更改为
[Unit]
Description=The NGINX HTTP and reverse proxy server
After=syslog.target network.target remote-fs.target nss-lookup.target[Service]
Type=forking
PIDFile=/usr/local/nginx/logs/nginx.pid
ExecStartPre=/usr/local/nginx/sbin/nginx -t
ExecStart=/usr/local/nginx/sbin/nginx  #此目录为软链接,实际指向/usr/local/nginx/sbin/nginx
ExecReload=/bin/kill -s HUP $MAINPID
ExecStop=/bin/kill -s QUIT $MAINPID
PrivateTmp=true[Install]
WantedBy=multi-user.target#编辑完成后保存退出
#清空当前nginx的所有进程,避免影响systemctl重启nginx服务
[root@webserver system]# pkill -f nginx#查看是否清空
[root@webserver system]# netstat -antulpe | grep 80#重载systemctl
[root@webserver system]# systemctl daemon-reload#启动nginx
[root@webserver system]# systemctl start nginx#查看状态
[root@webserver system]# systemctl status nginx.service
● nginx.service - The NGINX HTTP and reverse proxy serverLoaded: loaded (/usr/lib/systemd/system/nginx.service; enabled; preset: di>Active: active (running) since Thu 2025-07-24 12:47:07 CST; 13s agoProcess: 4073 ExecStartPre=/usr/local/nginx/sbin/nginx -t (code=exited, sta>Process: 4074 ExecStart=/usr/local/sbin/nginx (code=exited, status=0/SUCCES>Main PID: 4075 (nginx)Tasks: 2 (limit: 10702)Memory: 1.6MCPU: 13msCGroup: /system.slice/nginx.service├─4075 "nginx: master process /usr/local/sbin/nginx"└─4076 "nginx: worker process" 
nginx全局配置:高并发
#进入/usr/local/nginx/conf
vim nginx.confuser  nginx;
worker_cpu_affinity 0001 0010;	#cup绑定进程
worker_processes  2;	#设置开机自启进程为2,通常与内核个数匹配
worker_rlimit_nofile 100000;	#每个工作进程最大文件描述符限制
error_log  logs/error.log;
#error_log  logs/error.log  notice;
#error_log  logs/error.log  info;pid        logs/nginx.pid;events {worker_connections  100000;		#设置每个工作进程同时处理的最大连接数use epoll;	#设置i/o模型为异步非阻塞
}[root@webserver conf]# cd /etc/security/
[root@webserver security]# vim limits.conf
#@student        -       maxlogins       4
*                -       nofile          100000
*                -       nproc           100000#*                -       nofile          100000
含义:对所有用户(* 通配符),将单个进程的最大打开文件数(nofile 即 "number of open files")限制为 100000。
作用:防止因文件描述符耗尽导致服务崩溃(如高并发 Web 服务、数据库等)。# *                -       nproc           100000
含义:对所有用户,将最大进程数(nproc 即 "max user processes")限制为 100000。
作用:防止用户创建过多进程拖垮系统(如 fork 炸弹攻击)。 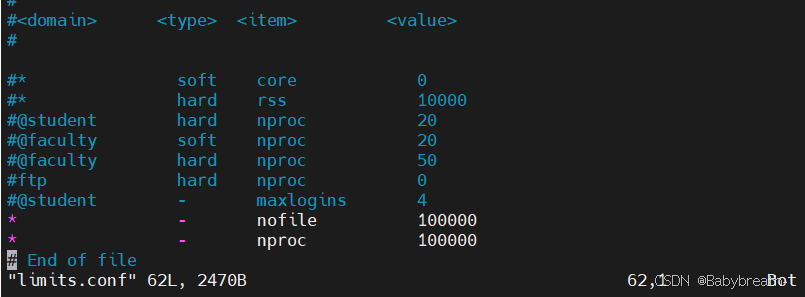
创建一个简单的pc站点
#添加策略指向子配置文件
include "/usr/local/nginx/conf.d/*.conf";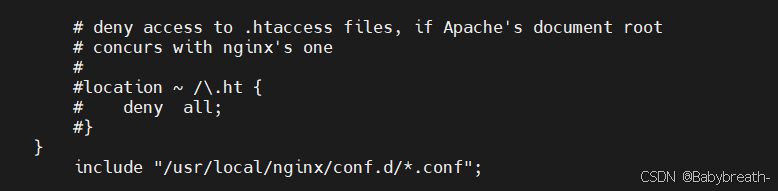
#创建目录存放子配置目录
mkdir -p /usr/local/nginx/conf.d#编写子配置目录
[root@webserver conf.d]# vim /usr/local/nginx/conf.d/vhosts.conf
server{listen  80;		#端口server_name www.test.org;	#访问域名root    /web/html;	#默认发布目录index   index.html;	#默认发布文件
}#重启nginx服务
systemctl restart nginx#编写本地解析
[root@webserver conf.d]# cat /etc/hosts
127.0.0.1   localhost localhost.localdomain localhost4 localhost4.localdomain4
::1         localhost localhost.localdomain localhost6 localhost6.localdomain6
192.168.75.150  rh9
192.168.75.10   webserver
192.168.75.10   www.test.org  #写入域名
测试
[root@webserver conf.d]# curl 192.168.75.10  #访问IP
192.168.75.10
[root@webserver conf.d]# curl www.test.org	#访问域名=
web_html
nginx账户认证功能
#创建nginx所需要的认证文件  当认证文件不存在时需要-c建立
[root@webserver conf.d]# htpasswd -cm /usr/local/nginx/.htpasswd admin
New password:	#输入密码
Re-type new password:	#再次输入密码
Adding password for user admin#创建新用户  	当认证文件存在时使用-c会覆盖原文件内容
[root@webserver conf.d]# htpasswd -m /usr/local/nginx/.htpasswd yna
New password:
Re-type new password:
Adding password for user yna[root@webserver conf.d]# cat /usr/local/nginx/.htpasswd
admin:$apr1$QZW0/k7N$RPsbM9A80xtD5t9WASs4h1
yna:$apr1$mMCbF9jP$T0g/Pi52ZKK0j8Egg8KBS1#创建文件放置认证成功的内容
[root@webserver ~]# mkdir -p /web/nginx/test.org/yna/login
[root@webserver ~]#
[root@webserver ~]# echo login > /web/nginx/test.org/yna/login/index.html#编辑配置文件
server{listen  80;server_name www.test.org;root    /web/html;index   index.html;error_page 500 502 503 404 403 /errorpage/error.html;error_log /usr/local/nginx/logs/test.org.err;access_log /usr/local/nginx/logs/test.org.access;location = /test {return 200 "= \n";}location ^~ /test {return 200 "^~ \n";}location ~* /test {return 200 "~* \n";}location /login/{root /web/nginx/test.org/yna;  #访问目录index index.html;auth_basic "PLIEASE input username and password";	# 是 Nginx 提供的指令,用来“打开” Basic 认证。auth_basic_user_file /usr/local/nginx/.htpasswd;#指定保存“账号/密码”的文件路径}location /errorpage {root /web/;}
}#重启并测试
[root@webserver conf.d]# nginx -t
nginx: the configuration file /usr/local/nginx/conf/nginx.conf syntax is ok
nginx: configuration file /usr/local/nginx/conf/nginx.conf test is successful
[root@webserver conf.d]# nginx -s reload[root@webserver conf.d]# curl www.test.org/login/ -u yna:123456
login![]()
location参数
#alias与root的区别root:路径末尾是否加 / 都可以。
alias:末尾必须加 /,否则可能导致路径错误location /static/ {root /var/www/html;
}
#请求/static/images/logo.png 实际路径/var/www/html/static/images/logo.pnglocation /static/ {alias /var/www/assets/;
}
#请求 /static/images/logo.png 实际路径/var/www/assets/images/logo.png
自定义错误界面
#创建错误存放错误界面内容的文件目录
[root@webserver conf.d]# mkdir /web/errorpage
[root@webserver conf.d]# echo "bad" > /web/errorpage/error.html#编辑配置文件
server{listen  80;server_name www.test.org;root    /web/html;index   index.html;error_page 500 502 503 404 403 /errorpage/error.html;	#写入错误码以及发生这些错误时应指向的文件#重启并测试
[root@webserver conf.d]# nginx -t
nginx: the configuration file /usr/local/nginx/conf/nginx.conf syntax is ok
nginx: configuration file /usr/local/nginx/conf/nginx.conf test is successful
[root@webserver conf.d]# nginx -s reload
[root@webserver conf.d]# curl www.test.org
web_html
[root@webserver conf.d]# curl www.test.org/ab
bad

自定义错误日志
#编写配置文件
server{listen  80;server_name www.test.org;root    /web/html;index   index.html;error_page 500 502 503 404 403 /errorpage/error.html;error_log /usr/local/nginx/logs/test.org.err;access_log /usr/local/nginx/logs/test.org.access;#测试

检测文件是否存在
vim /usr/loacl/nginx/conf/conf.d/vhosts.conf
echo default > /web/errorpage/default.html	#写入默认发布页try_files $uri $uri.html $uri/index.html /errorpage/default.html;	#在子配置文件写入,先检查磁盘上是否恰好存在与请求 URI 同名的文件。如果上一步没找到,再尝试给 URI 加 .html 后缀。如果前两步都没命中,再把它当成目录,看目录内有没有 index.html。前三步都失败时,Nginx 会内部重写到这个回退 URI(相当于重新发起一次子请求)。#测试
[root@webserver conf.d]# curl www.test.org/a
default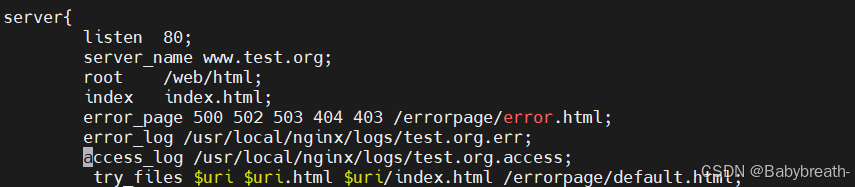
![]()
长链接配置
[root@webserver conf.d]# cd /usr/local/nginx/conf
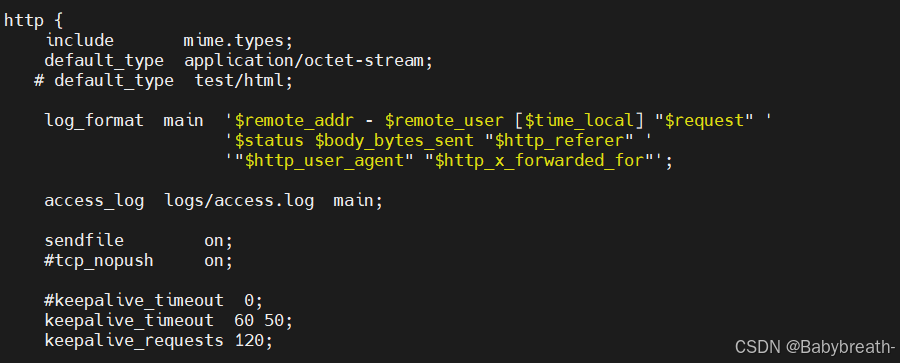
[root@webserver conf]# vim nginx.confhttp {include mime.types;default_type application/octet-stream;# default_type test/html;log_format main '$remote_addr - $remote_user [$time_local] "$request" ''$status $body_bytes_sent "$http_referer" ''"$http_user_agent" "$http_x_forwarded_for"';access_log logs/access.log main;sendfile on;#tcp_nopush on;#keepalive_timeout 0;keepalive_timeout 60 50; #设置用户访问超时时间,超时自动断开 60为实际超时时间,50为显示给用户的超时时间keepalive_requests 120; #设置最大并发量Features: alt-svc AsynchDNS brotli GSS-API HTTP2 HTTPS-proxy IDN IPv6 Kerberos Largefile libz NTLM NTLM_WB PSL SPNEGO SSL TLS-SRP UnixSockets
[root@webserver conf]# curl -v 192.168.75.10
* Trying 192.168.75.10:80...
* Connected to 192.168.75.10 (192.168.75.10) port 80 (#0)
> GET / HTTP/1.1
> Host: 192.168.75.10
> User-Agent: curl/7.76.1
> Accept: */*
>
* Mark bundle as not supporting multiuse
< HTTP/1.1 200 OK
< Server: nginx/1.26.1
< Date: Sat, 26 Jul 2025 03:41:51 GMT
< Content-Type: text/html
< Content-Length: 14
< Last-Modified: Thu, 24 Jul 2025 02:12:36 GMT
< Connection: keep-alive
< Keep-Alive: timeout=50 #最大超时时间
< ETag: "68819694-e"
< Accept-Ranges: bytes
<
192.168.75.10
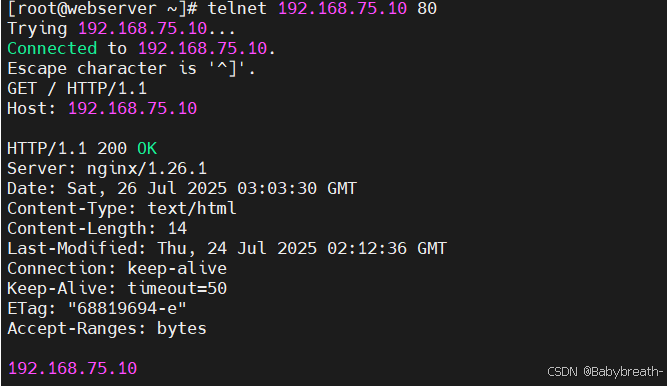
* Connection #0 to host 192.168.75.10 left intact[root@webserver ~]# dnf install telnet -y #安装测试工具[root@webserver ~]# telnet 192.168.75.10 80
Trying 192.168.75.10...
Connected to 192.168.75.10.
Escape character is '^]'.
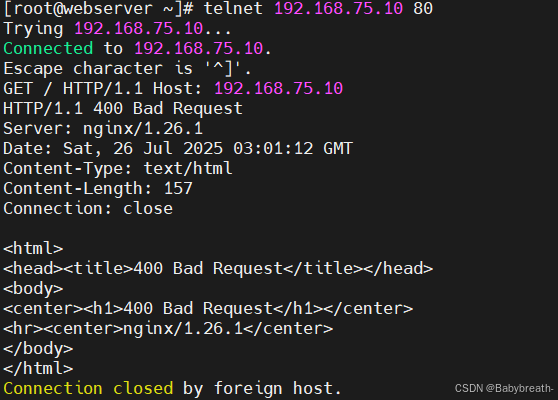
GET / HTTP/1.1 #手动写入
Host: 192.168.75.10 #手动写入HTTP/1.1 200 OK
Server: nginx/1.26.1
Date: Sat, 26 Jul 2025 03:03:30 GMT
Content-Type: text/html
Content-Length: 14
Last-Modified: Thu, 24 Jul 2025 02:12:36 GMT
Connection: keep-alive
Keep-Alive: timeout=50 #超时时间
ETag: "68819694-e"
Accept-Ranges: bytes192.168.75.10 #表示成功请求一次
超时显示:
作为下载服务器的配置
vim /etc/local/nginx/conf/conf.d/vhosts.conflocation /download{root /web/;autoindex on;autoindex_localtime on; #自动文件索引功能,默为offautoindex_exact_size off;#计算文件确切大小(单位bytes),off 显示大概大小(单位K、M),默认onautoindex_format html;#显示索引的页面文件风格,默认htmlset $limit_rate 1024k;#限制响应客户端传输速率(除GET和HEAD以外的所有方法),单位B/s,bytes/second,}[root@webserver conf.d]# curl www.test.org/download/
<html>
<head><title>Index of /download/</title></head>
<body>
<h1>Index of /download/</h1><hr><pre><a href="../">../</a>
<a href="yna">yna</a> 26-Jul-2025 11:05 200M
</pre><hr></body>
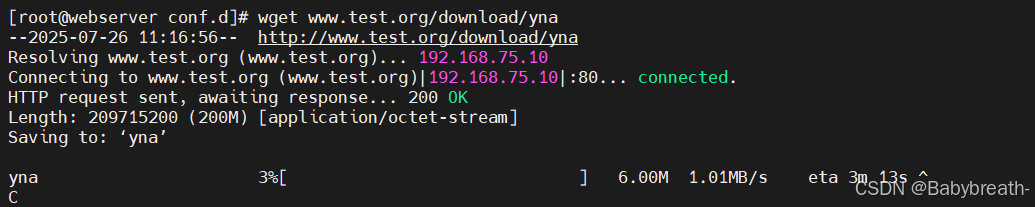
</html>[[root@webserver conf]# wget www.test.org/download/yna #尝试下载
--2025-07-26 11:39:47-- http://www.test.org/download/yna
Resolving www.test.org (www.test.org)... 192.168.75.10
Connecting to www.test.org (www.test.org)|192.168.75.10|:80... connected.
HTTP request sent, awaiting response... 200 OK
Length: 209715200 (200M) [application/octet-stream]
Saving to: ‘yna’yna 3%[=> ] 6.00M 1.01MB/s eta 3m 13s ^C #发现限速1mb左右
(单片机选型主要考虑的参数与因素))
提示词工程介绍)
相比,有什么优缺点?)


的MCAL配置之GtmCfg)

 ,功能全面、界面美观)
安装)


)
时,没有崩溃在函数调用处,而是崩在被调用函数内部)