前言
本文章对比了:小中大字符串在普通传值、传值移动、传左值引用、传右值引用、模板完美转发、内联版本等多种测试,对比各个方式的性能优异:
测试代码1
#include <iostream>
#include <string>
#include <chrono>
#include <utility>
#include <vector>
#include <functional>// 测量函数
template<typename Func>
double measureTime(Func&& func, int iterations) {auto start = std::chrono::high_resolution_clock::now();for (int i = 0; i < iterations; ++i) {func();}auto end = std::chrono::high_resolution_clock::now();return std::chrono::duration<double, std::milli>(end - start).count();
}class Media {
public:std::string mPath;// 0. 传值void setPath0(std::string path) {mPath = path;}// 1. 传值移动void setPath1(std::string path) {mPath = std::move(path);}// 2. 传左值引用void setPath2(const std::string& path) {mPath = path;}// 3. 传右值引用void setPath3(std::string&& path) {mPath = std::move(path);}// 4. 模板完美转发template<typename T>void setPath4(T&& path) {mPath = std::forward<T>(path);}// 5. 内联版本inline void setPathInline(const std::string& path) {mPath = path;}
};// 结果存储结构
struct TestResult {std::string name;double time;
};int main() {const int N = 10000;const int WARMUP = 1000; // 预热迭代// 测试不同大小的字符串std::vector<std::pair<std::string, std::string>> testStrings = {{"小字符串(24字节)", std::string(24, 'x')},{"中等字符串(1KB)", std::string(1024, 'x')},{"大字符串(1MB)", std::string(1024 * 1024, 'x')}};for (const auto& [sizeDesc, bigString] : testStrings) {std::cout << "\n===== 测试 " << sizeDesc << " =====\n";std::vector<TestResult> results;Media media;// 预热for (int i = 0; i < WARMUP; ++i) {media.mPath = bigString;}// 0. 值传递版本测试{std::string testStr = bigString;double time = measureTime([&]() {media.setPath0(testStr);}, N);results.push_back({"setPath0(值传递,左值传参)", time});}// 1. 传值版本测试 (左值){std::string testStr = bigString;double time = measureTime([&]() {media.setPath1(testStr);}, N);results.push_back({"setPath1(传值移动,左值传参)", time});}// 传值 + 右值传参测试{std::string testStr = bigString;double time = measureTime([&]() {media.setPath1(std::move(testStr));testStr = bigString;  // 还原数据}, N);results.push_back({"setPath1(传右值,右值传参)", time});}// 2. 传左值引用测试{std::string testStr = bigString;double time = measureTime([&]() {media.setPath2(testStr);}, N);results.push_back({"setPath2(传左值引用)", time});}// 3. 传右值引用测试{std::string testStr = bigString;double time = measureTime([&]() {media.setPath3(std::move(testStr));testStr = bigString;  // 还原数据}, N);results.push_back({"setPath3(传右值引用)", time});}// 4. 模板完美转发测试(左值){std::string testStr = bigString;double time = measureTime([&]() {media.setPath4(testStr);}, N);results.push_back({"setPath4(模板完美转发,左值传参)", time});}// 模板完美转发测试(右值){std::string testStr = bigString;double time = measureTime([&]() {media.setPath4(std::move(testStr));testStr = bigString;  // 还原数据}, N);results.push_back({"setPath4(模板完美转发,右值传参)", time});}// 5. 内联版本测试{std::string testStr = bigString;double time = measureTime([&]() {media.setPathInline(testStr);}, N);results.push_back({"setPathInline(内联版本)", time});}// 6. 直接赋值测试{std::string testStr = bigString;double time = measureTime([&]() {media.mPath = testStr;}, N);results.push_back({"直接赋值", time});}// 7. 直接赋值 + 移动{std::string testStr = bigString;double time = measureTime([&]() {media.mPath = std::move(testStr);testStr = bigString;  // 还原数据}, N);results.push_back({"直接赋值 + 移动", time});}// 输出结果并排序std::sort(results.begin(), results.end(), [](const TestResult& a, const TestResult& b) {return a.time < b.time;});std::cout << "性能排名 (从快到慢):\n";for (size_t i = 0; i < results.size(); ++i) {std::cout << i+1 << ". " << results[i].name << " 耗时: " << results[i].time << " 毫秒";if (i == 0) {std::cout << " (基准)";} else {double slowdown = (results[i].time / results[0].time - 1.0) * 100.0;std::cout << " (慢 " << slowdown << "%)";}std::cout << "\n";}}return 0;
}
测试结果:

测试代码2:
#include <iostream>
#include <string>
#include <chrono>
#include <utility>
#include <vector>
#include <functional>
#include <iomanip>
#include <random>
#include <numeric>// 测量函数
template<typename Func>
double measureTime(Func&& func, int iterations) {auto start = std::chrono::high_resolution_clock::now();for (int i = 0; i < iterations; ++i) {func();}auto end = std::chrono::high_resolution_clock::now();return std::chrono::duration<double, std::milli>(end - start).count();
}//#define RESTORE_DATA  //还原数据class Media {
public:std::string mPath;void setPath0(std::string path) {mPath = path;}void setPath1(std::string path) {mPath = std::move(path);}void setPath2(const std::string& path) {mPath = path;}void setPath3(std::string&& path) {mPath = std::move(path);}template<typename T>void setPath4(T&& path) {mPath = std::forward<T>(path);}inline void setPathInline(const std::string& path) {mPath = path;}
};struct TestResult {std::string name;double time;
};// 格式化输出浮点数
std::string formatDouble(double value, int precision = 2) {std::ostringstream oss;oss << std::fixed << std::setprecision(precision) << value;return oss.str();
}int main() {const int N = 10000;const int WARMUP = 1000;std::vector<std::pair<std::string, std::string>> testStrings = {{"小字符串(24字节)", std::string(24, 'x')},{"中等字符串(1KB)", std::string(1024, 'x')},{"大字符串(1MB)", std::string(1024 * 1024, 'x')}};for (const auto& [sizeDesc, bigString] : testStrings) {std::cout << "\n===== 测试 " << sizeDesc << " =====\n";std::vector<TestResult> results;Media media;// 预热for (int i = 0; i < WARMUP; ++i) {media.mPath = bigString;}// 0. 值传递版本测试{std::string testStr = bigString;double time = measureTime([&]() {media.setPath0(testStr);}, N);results.push_back({"setPath0(值传递,左值传参)", time});}// 0. 值传递,移动语义测试{std::string testStr = bigString;double time = measureTime([&]() {media.setPath0(std::move(testStr));#ifdef RESTORE_DATAtestStr = bigString;#endif}, N);results.push_back({"setPath0(值传递,移动语义)", time});}// 1. 传值版本测试 (左值){std::string testStr = bigString;double time = measureTime([&]() {media.setPath1(testStr);}, N);results.push_back({"setPath1(传值移动,左值传参)", time});}// 传值 + 右值传参测试{std::string testStr = bigString;double time = measureTime([&]() {media.setPath1(std::move(testStr));#ifdef RESTORE_DATAtestStr = bigString;#endif}, N);results.push_back({"setPath1(传右值,右值传参)", time});}// 2. 传左值引用测试{std::string testStr = bigString;double time = measureTime([&]() {media.setPath2(testStr);}, N);results.push_back({"setPath2(传左值引用)", time});}// 2. 传左值引用测试{std::string testStr = bigString;double time = measureTime([&]() {media.setPath2(std::move(testStr));}, N);results.push_back({"setPath2(传右值引用)", time});}// 3. 传右值引用测试{std::string testStr = bigString;double time = measureTime([&]() {media.setPath3(std::move(testStr));#ifdef RESTORE_DATAtestStr = bigString;#endif}, N);results.push_back({"setPath3(传右值引用)", time});}// 4. 模板完美转发测试(左值){std::string testStr = bigString;double time = measureTime([&]() {media.setPath4(testStr);}, N);results.push_back({"setPath4(模板完美转发,左值传参)", time});}// 模板完美转发测试(右值){std::string testStr = bigString;double time = measureTime([&]() {media.setPath4(std::move(testStr));#ifdef RESTORE_DATAtestStr = bigString;#endif}, N);results.push_back({"setPath4(模板完美转发,右值传参)", time});}// 5. 内联版本测试{std::string testStr = bigString;double time = measureTime([&]() {media.setPathInline(testStr);}, N);results.push_back({"setPathInline(内联版本)", time});}// 6. 直接赋值测试{std::string testStr = bigString;double time = measureTime([&]() {media.mPath = testStr;}, N);results.push_back({"直接赋值", time});}// 7. 直接赋值 + 移动{std::string testStr = bigString;double time = measureTime([&]() {media.mPath = std::move(testStr);#ifdef RESTORE_DATAtestStr = bigString;#endif}, N);results.push_back({"直接赋值 + 移动", time});}// 输出结果std::cout << "\n性能对比:\n";std::cout << std::setw(45) << std::left << "方法"<< std::setw(15) << "耗时(ms)"<< "性能比较\n";std::cout << std::string(80, '-') << "\n";double baselineTime = results[0].time; // 使用第一个测试作为基准for (const auto& result : results) {double percentage = ((baselineTime) / result.time) * 100.0;std::cout << std::setw(45) << std::left << result.name<< std::setw(15) << formatDouble(result.time);if (std::abs(percentage) < 0.1) {std::cout << "基准性能";} else if (percentage > 0) {std::cout << "快 " << formatDouble(percentage) << "%";} else {std::cout << "慢 " << formatDouble(-percentage) << "%";}std::cout << "\n";}}return 0;
}
测试结果:
需要还原数据:

不需要还原数据: 注释#define RESTORE_DATA

结论
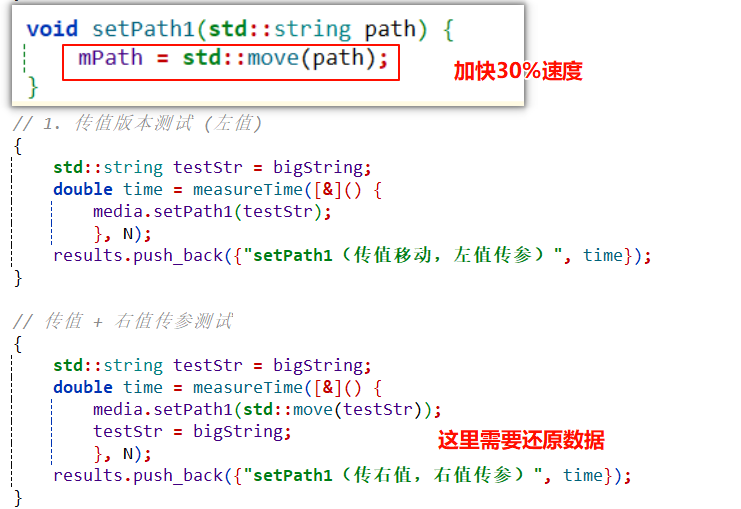
1. 首先注意第一点,函数内适当使用移动语义确实可以提高效率,需要还原数据时大概在30%左右,不需要还原数据时,效率提高巨大。
2. 需要注意的是,如果传递给函数的值也是move过的话,反而因为move会把原来的变量给清除,所以如果后面还需要的话,需要还原,其实效率提高并没有多少。
3. 接上一条,但是如果数据不需要了,不需要还原数据,那么效率提高将会极大,
具体代码可以将代码开头的 #define RESTORE_DATA给注释掉。

4. 如果需要还原数据,并且兼顾代码更好写,那么左值引用是个不错的选择,还不用写还原数据:


可以说,即高效又方便。比起内联函数和完美转发,效率不遑多让。
5. 如果不需要还原数据,那么下图框出来的几个都可以,setPath3右值引用兼顾代码好写和性能


6. 由数据可知,完美转发虽然写法复杂,但是兼容性好,性能高,如果掌握了其实更好用
完美转发的优劣势:
- 完美转发能够保留参数的左值/右值属性,使函数能够根据参数的原始类型进行正确的转发,避免了不必要的拷贝和转换,提高了性能
- 无需为左值和右值分别编写重载函数,一个模板函数就能处理多种参数类型,减少代码冗余
- 可以编写通用的工厂函数,将参数完美转发给构造函数,便于实现代理、装饰器等设计模式
- 完美转发会保留参数的const属性,确保类型安全
- 库设计者可以提供更灵活的接口,而不必担心参数传递的效率问题
最适合使用完美转发的场景
-
通用工厂函数:
- 转发包装器/代理函数:
- 当你需要包装一个函数,同时保留其参数的所有特性时
-
可变参数模板函数:
- 处理不定数量、不定类型的参数时
-
构建通用容器:
- 实现如
emplace_back等需要直接构造对象的容器方法
- 实现如
-
中间层API设计:
- 当你的函数只是将参数传递给另一个函数,而不做任何处理时
-
性能关键的代码:
- 需要避免不必要拷贝的性能敏感代码
不适合使用完美转发的场景
-
简单的函数接口:
- 如果参数类型固定且简单,使用常规引用可能更清晰
-
需要明确参数类型的API:
- 当你希望API使用者明确知道参数如何传递时
-
教学或入门级代码:
- 对于学习者来说,完美转发可能过于复杂
-
需要对参数进行多次使用的场景:
- 由于右值引用可能被移动,如果需要多次使用参数,完美转发可能不是最佳选择
完美转发其他实例代码
#include <iostream>
#include <string>
#include <memory>
#include <vector>
#include <type_traits>// 用于显示参数类型的辅助函数
template<typename T>
void showValueCategory(const std::string& funcName, T&& param) {std::cout << funcName << ": ";// 使用完整的类型判断if (std::is_same<T, std::remove_reference_t<T>>::value) {std::cout << "参数是右值" << std::endl;}else if (std::is_lvalue_reference<T>::value) {std::cout << "参数是左值" << std::endl;}else {std::cout << "参数是转发的右值" << std::endl;}
}//===== 示例1:字符串包装类 =====
class Message {
public:// 构造函数使用完美转发template<typename T>Message(T&& msg) : content_(std::forward<T>(msg)) {showValueCategory("Message构造", std::forward<T>(msg));// 显示更详细的类型信息std::cout << "  类型信息: " << (std::is_lvalue_reference<T>::value ? "左值引用" : std::is_rvalue_reference<T>::value ? "右值引用" : "值类型")<< std::endl;}const std::string& getContent() const { return content_; }private:std::string content_;
};//===== 示例2:工厂函数 =====
template<typename T, typename... Args>
std::unique_ptr<T> createObject(Args&&... args) {std::cout << "创建新对象...\n";// 显示每个参数的类型信息(showValueCategory("工厂函数参数", std::forward<Args>(args)), ...);return std::make_unique<T>(std::forward<Args>(args)...);
}//===== 示例3:通用打印函数 =====
class Printer {
public:template<typename T>void print(T&& value) {showValueCategory("打印函数", std::forward<T>(value));std::cout << "打印内容: " << value << std::endl;}
};//===== 示例4:参数转发容器 =====
template<typename T>
class Container {
public:template<typename Arg>void add(Arg&& arg) {showValueCategory("Container添加", std::forward<Arg>(arg));data_.emplace_back(std::forward<Arg>(arg));}void showAll() const {std::cout << "容器内容:";for (const auto& item : data_) {std::cout << item.getContent() << " ";}std::cout << std::endl;}private:std::vector<T> data_;
};// 辅助函数:显示对象移动状态
void showMove(const std::string& str) {std::cout << "String '" << str << "' 被移动" << std::endl;
}int main() {std::cout << "\n===== 完美转发示例 =====\n";// 测试1:基础构造函数转发std::cout << "\n1. 测试基础构造函数转发:" << std::endl;{std::string str = "Hello";                  // 创建左值std::cout << "传递左值:" << std::endl;Message msg1(str);                          // 传递左值std::cout << "传递右值字面量:" << std::endl;Message msg2("World");                      // 传递右值字面量std::cout << "传递移动的值:" << std::endl;Message msg3(std::move(str));              // 传递右值(移动)}// 测试2:工厂函数转发std::cout << "\n2. 测试工厂函数转发:" << std::endl;{std::string name = "Factory Object";std::cout << "\n使用左值创建:" << std::endl;auto msg1 = createObject<Message>(name);std::cout << "\n使用右值创建:" << std::endl;auto msg2 = createObject<Message>(std::string("Direct String"));std::cout << "\n使用字符串字面量创建:" << std::endl;auto msg3 = createObject<Message>("Literal String");}// 测试3:打印函数转发std::cout << "\n3. 测试打印函数转发:" << std::endl;{Printer printer;std::string text = "Left Value Text";std::cout << "打印左值:" << std::endl;printer.print(text);std::cout << "打印右值:" << std::endl;printer.print(std::string("Right Value Text"));std::cout << "打印字面量:" << std::endl;printer.print("Literal Text");}// 测试4:容器转发std::cout << "\n4. 测试容器转发:" << std::endl;{Container<Message> container;std::string item1 = "First";std::cout << "添加左值:" << std::endl;container.add(item1);std::cout << "添加右值:" << std::endl;container.add(std::string("Second"));std::cout << "添加字面量:" << std::endl;container.add("Third");container.showAll();}return 0;
}


,附代码)
:Spring Boot实现连接不上数据库就重启服务)


)


 7.10.0详细教程)